


NetWare with NetWare Administrator 4–13
4 Configuring Your Network Printer
NetWare with NetWare Administrator
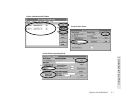
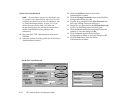
This section describes how to add your Silentwriter to
the network using NetWare NOS version 4.1 and
NetWare Administrator. You may choose either
Network Printer or Remote Printer mode.
The following steps summarize how to connect your
Silentwriter in either Network Printer or Remote Printer
mode.
1. Select the operating mode (Network or Remote).
2. Install NetWare Client software on the workstation.
3. Identify the printer.
4. Establish the printer on the network.
5. Enable the print server (for Remote Printer mode
only).
These steps are described in detail below.
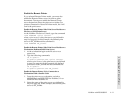
Select the Operating Mode
Before you add the Silentwriter to your network, you
must choose a network operating mode for your
Silentwriter. The Silentwriter can be used in three
different modes—local, network, and remote. The 1765
Administration software for NetWare allows you to
choose between Network Printer or Remote Printer
network modes. Remote printers can be connected with
ethernet cables or via the parallel port. Each mode is
described in more detail in this section.
Local Printers
Local printers connect directly to a single computer
workstation with a bidirectional parallel cable. Local
printers can be shared on peer-to-peer networks but are
not part of the NetWare client/server network. For more
information on using your Silentwriter as a Local
Printer see the User’s Guide.
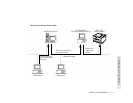
Network Printers
Network printers connect directly to a network. The
network printer’s LAN card acts as a print server for the
printer. Users can monitor their output with NEC 1765
software and take advantage of high-speed Ethernet
connections.