


28
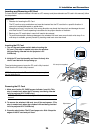
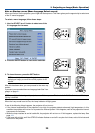
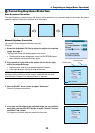
POINTER
LASER
MAGNIFY
PAGE
OFF
POWER
ON
E
N
T
E
R
M
E
N
U
E
X
I
T
R
-
C
L
I
C
K
UP
DOWN
PC CARD
SOURCE
AUTO ADJUST
3D REFORM
LAMP
STATUS
POWERON/STAND BY
E
N
T
E
R
E
X
I
T
M
E
N
U
SELECT
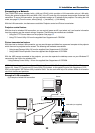
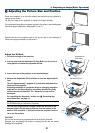
3. Projecting an Image (Basic Operation)
This section describes how to turn on the projector and to project a picture onto the screen.
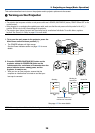
ᕡ Turning on the Projector
NOTE:
• The projector has two power switches: a main power switch and a POWER (ON/STAND BY) button (POWER ON and OFF on the
remote control).
• When plugging in or unplugging the supplied power cable, make sure that the main power switch is pushed to the off (
⅜
)
position. Failure to do so may cause damage to the projector.
• The projector has a feature to prevent itself from being used by unauthorized individuals. To use this feature, register a
keyword. See "Security" in "Setup" on page 48 for more details.
1. To turn on the main power to the projector, press the
Main Power switch to the on position ( I ).
• The POWER indicator will light orange.
See the Power Indicator section on page 123 for more
details.
2. Press the POWER (ON/STAND BY) button on the
projector cabinet or POWER ON button on the
remote control for a minimum of 2 seconds when the
power indicator turns a steady green, and the
projector is ready to use.
• After you turn on your projector, ensure that the
computer or video source is turned on and that your
lens cap is removed.
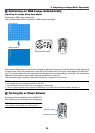
NOTE: When no signal is available, a blue, black or logo screen is displayed.
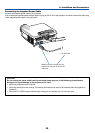
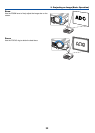
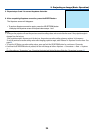
STATUS
LAMP
POWER
POWER
POWER POWER
STATUS
LAMP
STATUS
LAMP
STATUS
LAMP
ON/STAND BY
Standby
Blinking for
one minute
Power On
Steady orange
light
Blinking green
light
Steady green
light
See page 123 for more details.
Press this button for a
minimum of 2 seconds.