


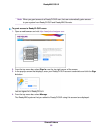
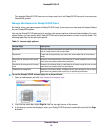
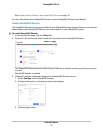
5. Next to the system to which you want to grant access, click the Invite User button.
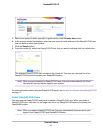
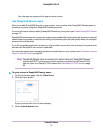
6. In the pop-up screen that displays, enter the user name or email address of the ReadyCLOUD user
that you want to add to your system.
7. Click the Search button.
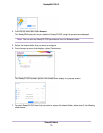
8. From the results list, select the ReadyCLOUD user that you want to add and click the Invite button.
The selected ReadyCLOUD user is added to the Users list. This user can now use his or her
ReadyCLOUD account to access your ReadyNAS system.
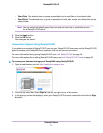
When you grant access to a ReadyCLOUD user, that user is also added to the Cloud
Users list on the local admin page for your system.
Note:
For more information about using the ReadyCLOUD portal, see Access Your System Using ReadyCLOUD
on page 71.
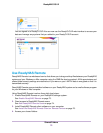
Delete ReadyCLOUD Users
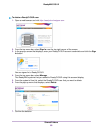
You must use the ReadyCLOUD web portal to delete a ReadyCLOUD user. When you delete a
ReadyCLOUD user, that user can no longer use his or her ReadyCLOUD account to access your
ReadyNAS system.
When you delete a ReadyCLOUD user, that user automatically loses access to your
system from ReadyCLOUD and ReadyNAS Remote.
Note:
Shared Folders
67
ReadyNAS OS 6.2