E–26
Using the Menus
1. Press the “Menu” button on the remote control or the projec-
tor cabinet to display the Menu.
2. Press the
buttons on the remote control or the projector
cabinet to highlight the menu for the item you want to adjust
or set.
3. Press the
button or the “Enter” button on the remote con-
trol or the projector cabinet to select a submenu or item.
4. Adjust the level or turn the selected item on or off by using
“Select”
or buttons on the remote control or the projec-
tor cabinet. The on-screen slide bar will show you the amount
of increase or decrease.
5. The change is stored until you adjust it again.
CANCEL: Return to the previous screen.
6. Repeat steps 2-5 to adjust an additional item, or press “Can-
cel” on the remote control or the projector cabinet to quit the
menu display.
In this example, the lens is shifted vertically to move the image
to the top or bottom.
SOURCE
AUTO ADJUST
ON
STAND BY
STATUS
POWER
E
M
N
U
C
N
A
C
E
L
T
E
R
N
E
SE
LEC
T
A
C
IN
IN
O
U
T
IN
IN
L
/
M
O
N
O
R
IN
IN
R
G
B
O
U
T
R
G
B
IN
C
O
N
T
R
O
L
P
C
2
1
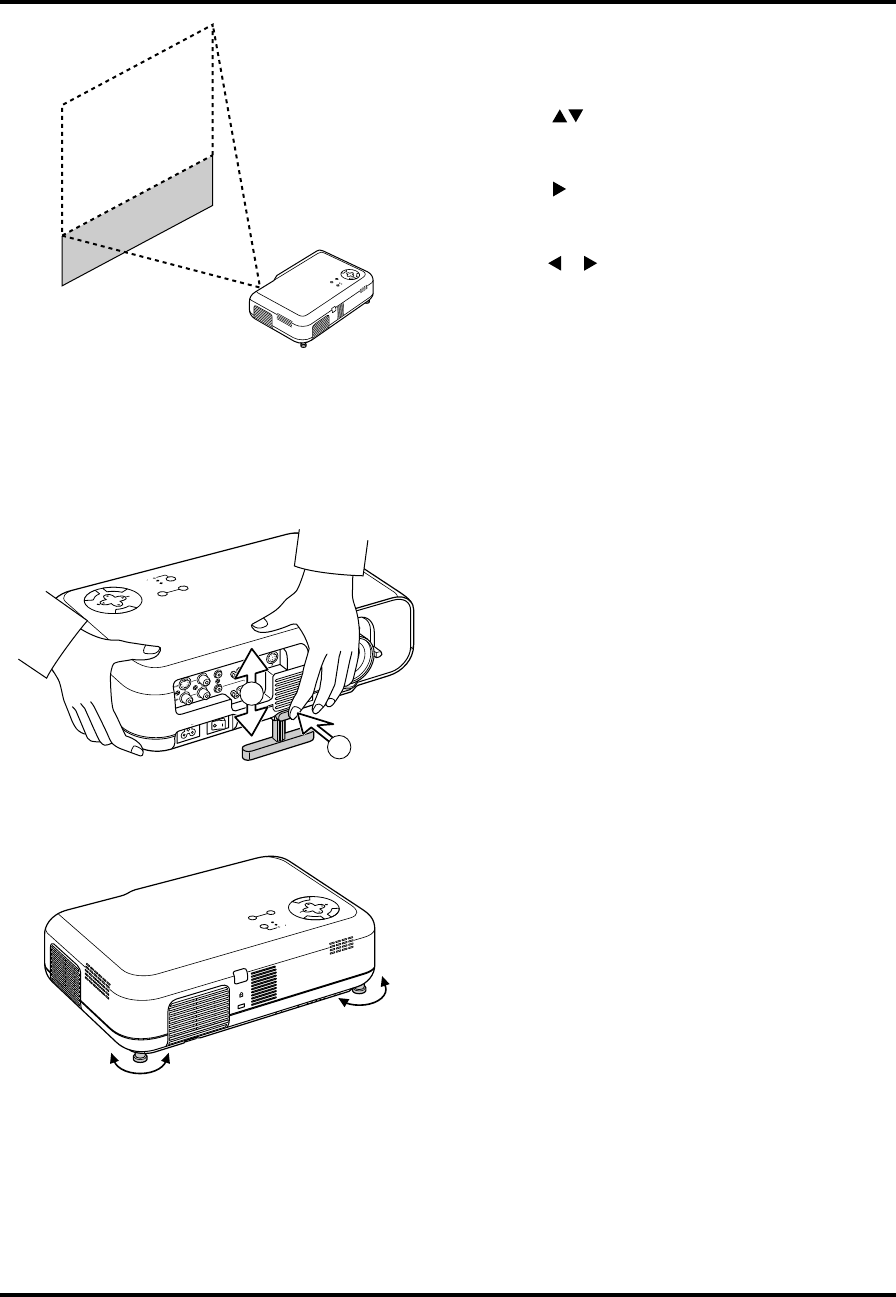
Adjusting the Tilt Foot
1) Press and hold the Tilt button on the front of the projector.
2) Lift the front edge of the projector to the height you want, and
release the button to lock the Adjustable Tilt Foot.
To fine-tune the image’s position vertically on the screen, rotate
the foot. Each of the rear feet height can be changed up to 1 mm /
0.04 inch
SOURCE
E
M
N
U
C
N
A
C
E
L
T
E
R
N
E
S
E
L
E
C
T
AUTO ADJUST
ON
STAND BY
STATUS
POWER
• If the projected image does not appear square to the screen
then use keystone correction for proper adjustment.
Adjust the size of the image using the Zoom lever on the
lens and obtain the best focus using the Focus ring.


