7
Software Description
ABS / Air Bag 2004 User Guide Chapter 1: General Information
Vehicle Identification Screen
When you select ABS / Air Bag 2004 from the Scan
Diagnostics menu, the first Vehicle Identification
screen appears.
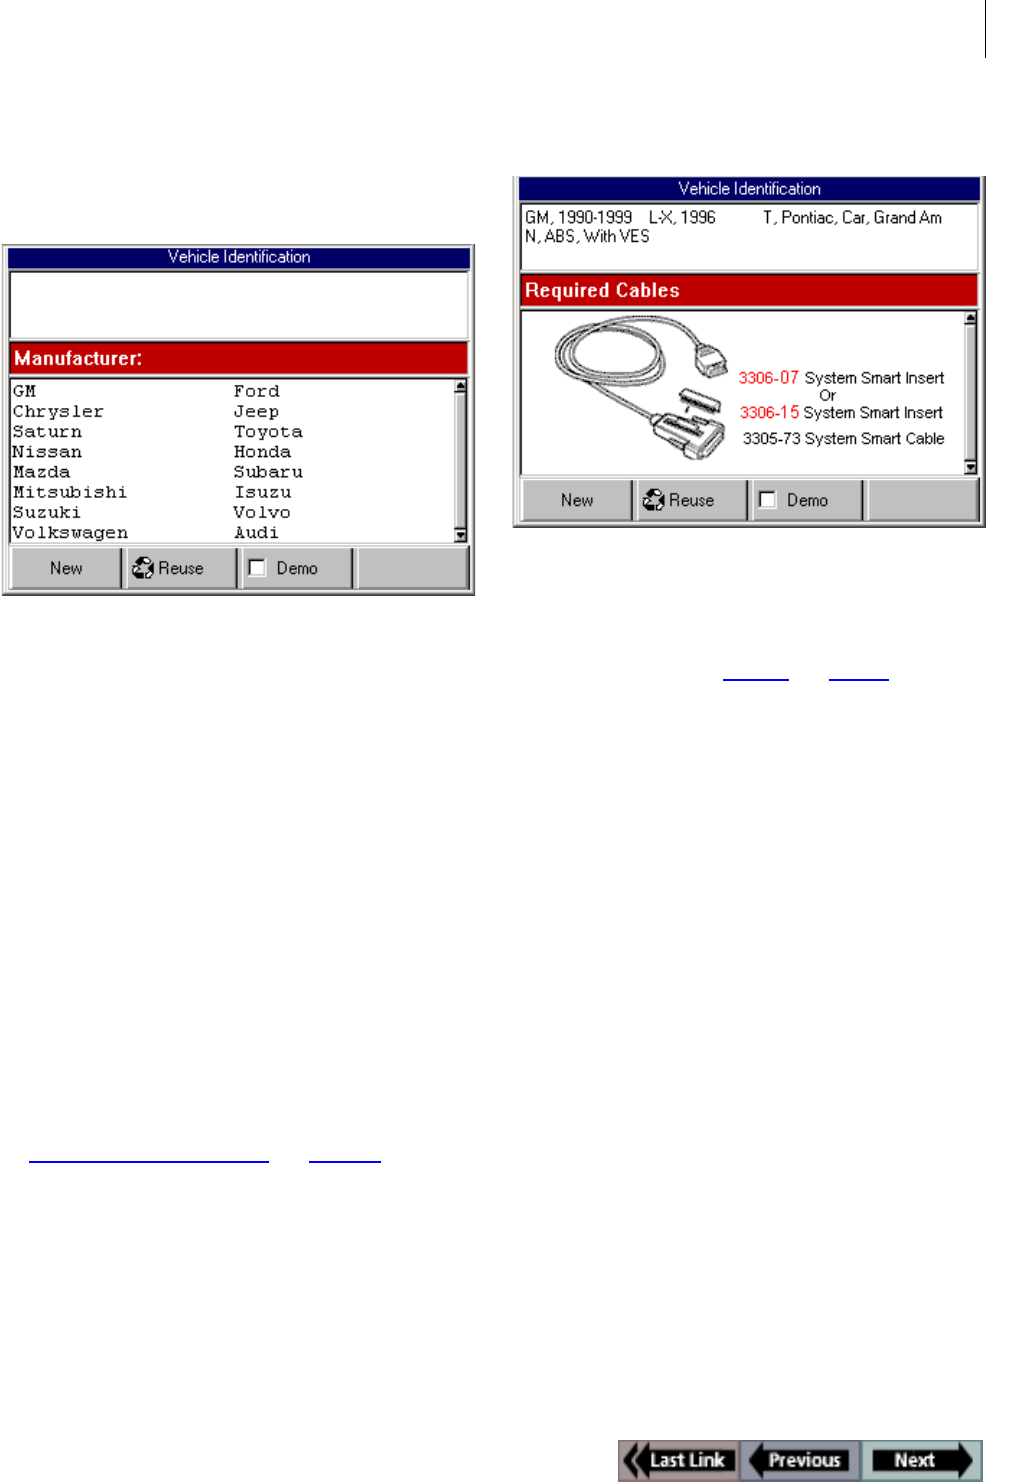
Figure 1.14: Vehicle Identification Screen
The Vehicle Identification screen has three sections as
follows:
•
top section - displays vehicle identification information
as you select options from the middle section.
• middle section - contains options you select in order to
enter identification information for a vehicle. When you
select an option and press the ENTER key, the selected
option appears in the top section and the middle section
changes to the next group of selection options. For exam-
ple, the middle section shown above is for selecting the
manufacturer. After you select a manufacturer, the middle
section changes to options for selecting the vehicle’s year
range. After you have entered all the information for a
vehicle, the middle section displays the cable connections
required for the vehicle (shown on the next page).
• bottom section - contains function keys for: 1) entering
new information for a vehicle, 2) selecting and reusing
information for a vehicle previously tested, and 3) viewing
demonstration data.
For detailed information about using this screen, refer
to “Chapter 2:
Start-up Steps” on page 13.
Vehicle Identification - Required Cables
Screen
Figure 1.15: Vehicle Identification - Required Cables Screen
After you have entered all the information for a vehicle,
the top section displays the vehicle information and the
middle section displays the cable connections required
for the vehicle (refer to “Cables
” on page 3).
With this screen displayed, you make the cable con-
nections to the NGIS tool and the vehicle and then
press the ENTER key. This displays the Diagnostic
Menu screen for the vehicle being tested, as described
on the next page.
