17
Preparations
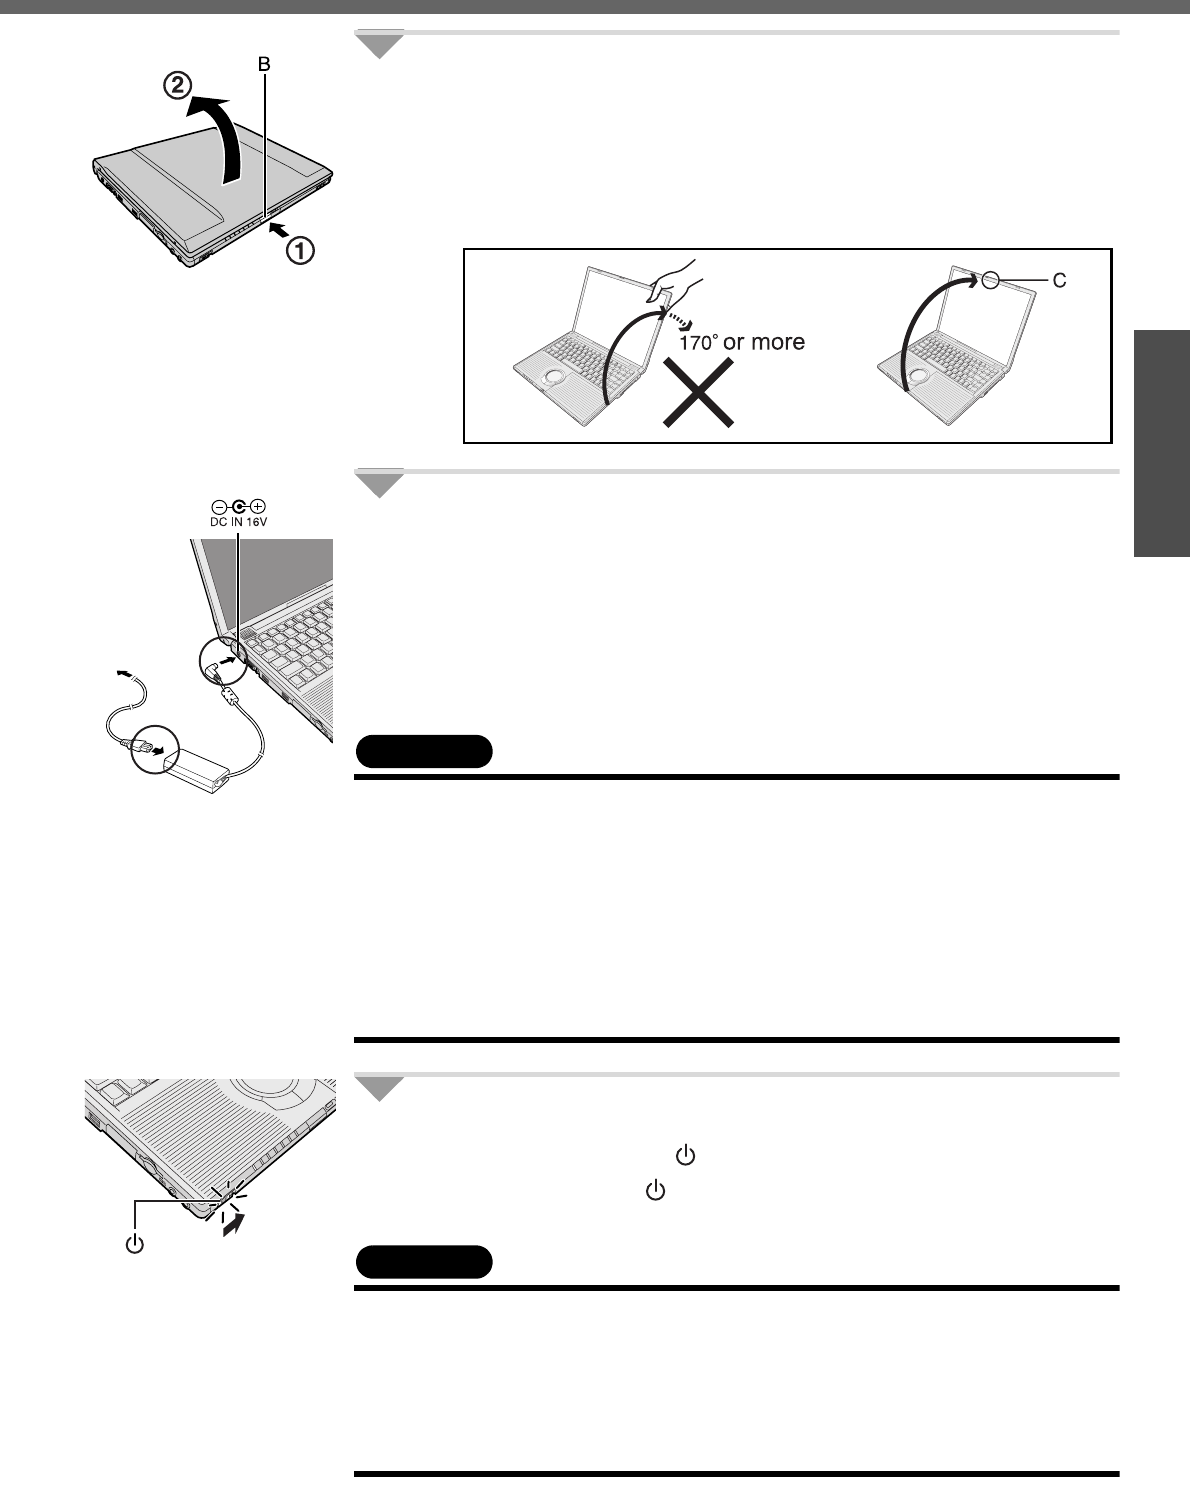
4 Open the display.
A Press and hold the latch (B) located at the front.
B Lift open the display.
z Do not open the display wider than necessary (170° or more), and do
not apply excessive pressure to the LCD. Do not open or close the
computer holding the edge of the LCD segment. Hold the C (below)
segment to open or close the computer.
5 Connect your computer to a power outlet.
z Be sure the AC adaptor is connected until completing the first-time use
operation.
z The battery pack will be charged automatically.
Charging Time: Approx. 5 hours (Power off), Approx. 6.5 hours (Power on)
(Varies depending on the usage conditions.)
z When using the computer for the first time, do not connect any peripheral
device except the battery pack and AC adaptor to the computer.
CAUTION
Handling the AC adaptor
z Do not subject the AC adaptor to any strong impact.
Using the AC adaptor after a strong impact such as being dropped may result in
electrocution, short circuit, or fire.
z Use only the specified AC adaptor with your computer. Using an AC adaptor
other than the one supplied might damage the battery and/or the computer.
z Problems such as sudden voltage drops may arise during periods of thunder
and lightning. Since this could adversely affect your computer, an uninterrupt-
ible power source (UPS) is highly recommended unless running from the battery
pack alone.
6 Turn your computer on.
z Slide the power switch and hold it for approximately one second until
the power indicator turns on before releasing it.
CAUTION
z Do not slide the power switch and hold it for more than four seconds; this will
cause the power to be turned off forcibly.
z Do not slide the power switch repeatedly.
z Do not press any keys or touch the touch pad until [Windows XP Professional
Setup] is displayed.
z Do not change the Setup Utility until completing step 7. If you do so, Windows
setup may not operate properly.


