


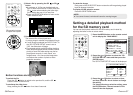
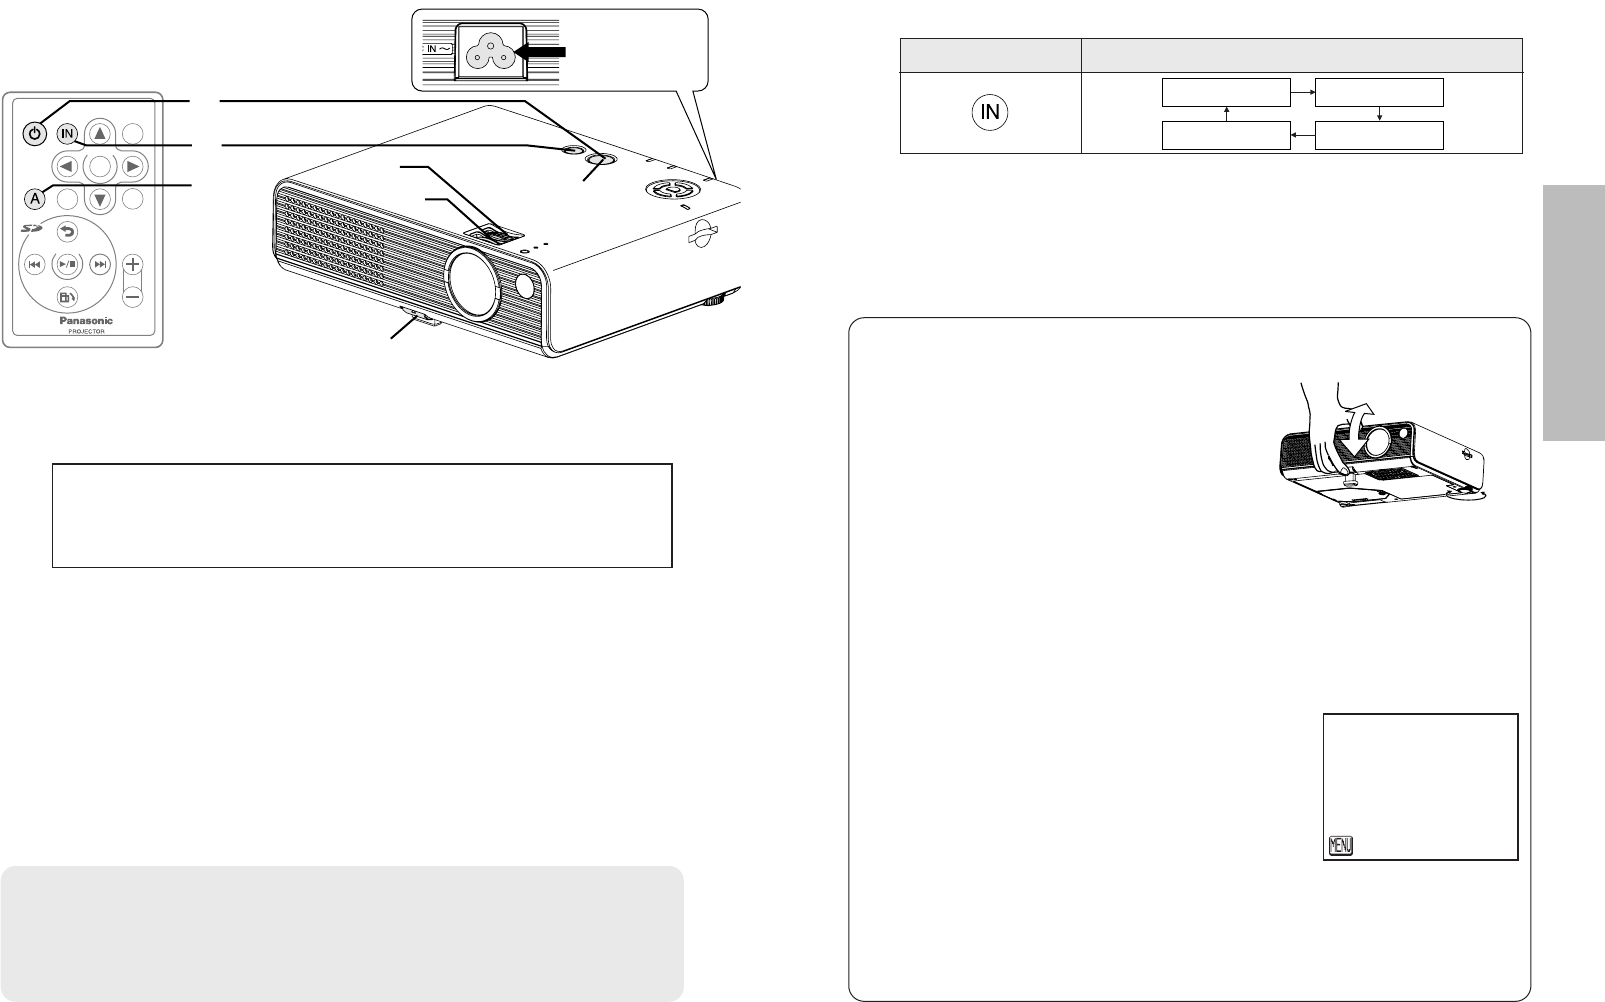
Input select button
ENGLISH-27
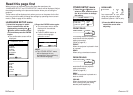
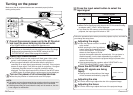
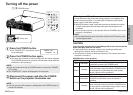
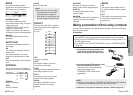
Turning on the power
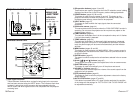
Connect the accessory power cord to the AC IN socket
and insert the power cord plug into the wall outlet.
BThe POWER button on the projector will illuminate red.
Press the POWER button.
BThe POWER button on the projector will flash green. After a short
period, it will illuminate green, and a picture will be projected.
B
The input signal indicators will illuminate while the projector is
searching for an input signal (approximately 3 minutes). If the projector
detects an input signal, it will use that signal for projection. If no signal
is detected, the guide screen for computer connection will be
displayed. The input signal search will be finished if the INPUT button
or MENU button is pressed while the guide screen is being displayed.
Turn on the power of all connected devices.
BStart the play function of a device such as a DVD player.
NOTE:
B
If the power cord was disconnected during projection when the projector was
used the last time, projection will start after the power cord is connected
.
BA tinkling sound may be heard when the lamp unit is turned on, but this
is not a sign of a malfunction.
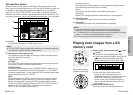
Press the input select button to select the
input signal.
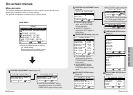
Follow the procedure below when you set the projector up first, and when
you change the setup place.
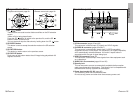
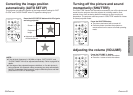
Press the AUTO SETUP button
(when PC signals are being
input).
BSettings such as the position of the image
will be corrected automatically. (page 30)
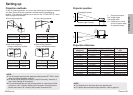
Adjusting the size
BTurn the zoom ring to adjust the size of the projected image.
Adjusting the focus
BTurn the focus ring to adjust the focus of the projected image.
&
'
)
*
(
#
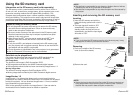
Adjusting the angle
BPlace the projector so that it is vertical
to the screen.
BWhile pressing the front leg adjuster
button, adjust the forward/back angle
of tilt of the projector. This projector
detects its own degree of tilt and
corrects the keystone distortion automatically. If the projector is
tilted horizontally, turn the back adjustable leg to adjust the
horizontal tilt. Adjust so that the projected image is placed at the
center of the screen.
BIf the keystone distortion remains, adjust “KEYSTONE” in the
“POSITION ADJUSTMENT” menu. (page 46)
B
A picture will be projected in accordance with the selected input signal
.
BWhen YPBP
R signals are being input to the PC IN connector using
an adapter cable, “YP
B
PR” will be displayed.
BIf you insert the SD memory card while other signals are being
projected, the input signal will switch to “SD”.
26-ENGLISH
POWER button
Changing signals
POWER
AUTO
SETUP
INPUT MENU
SHUTTER
VOLUME
ENTER
R OTAT E
RETURN
ENTER
STD
)
*
$
&
(
'
#
BIf the SD memory card is inserted into the SD memory card slot, the
lamp will turn on automatically and the projection will start. (The image
displayed will vary depending on the “MODE” setting in the “SD
PICTURE SETUP” menu. Refer to page 38 for details.)
$
%
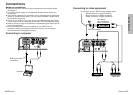
Make sure that all peripheral devices are connected properly before
turning on the power.
Power cord
Basic operation
AUTO SETUP
ESC