ENGLISH-63
62-ENGLISH
Specifications
Power supply: 100 V - 240 V ~, 50 Hz/60 Hz
Power consumption: 180 W [During standby (when fan is
stopped): Approx. 3 W]
Amps: 2.2 A - 1.0 A
LCD panel:
Panel size (diagonal): 0.6 type (15.24 mm)
Aspect ratio: 4:3
Micro lens array: Available
Display method: 3 transparent LCD panels (RGB)
Drive method: Active matrix method
Pixels: 480 000 (800 x 600) x 3 panels
Lens: Manual zoom (1.2 x) / Manual focus
F 1.7 - 1.8 f 17.0 mm - 20.4 mm
Lamp: UHM lamp (130 W)
Luminosity: 1 500 lm
Scanning frequency (for RGB signals):
Horizontal scanning frequency: 15 kHz - 91 kHz
Vertical scanning frequency: 50 Hz - 85 Hz
Dot clock frequency: Less than 100 MHz
YPBP
R signals: 480i, 576i, 480p, 576p, 1 080/60i,
1 080/50i, 720/60p
Color system: 7 (NTSC/NTSC 4.43/PAL/PAL-M/PAL-N/
PAL60/SECAM)
Projection size: 965 mm - 7 620 mm (38˝ - 300˝)
Throw distance: 1.2 m - 9.9 m (3´11˝ - 32´5˝)
Optical axis shift: 4:1 (fixed)
Screen aspect ratio: 4:3
Installation: Front/Rear/Ceiling/Desk (menu selection)
Speaker: 2.0 cm round x 1
Max. usable volume output: 0.5 W (mono)
Connectors
PC IN: Single-line, D-sub HD 15-pin (female)
During RGB input:
R.G.B.: 0.7 V [p-p], 75 Ω
G.SYNC: 1.0 V [p-p], 75 Ω
HD/SYNC: TTL, automatic positive/negative polarity
compatible
VD: TTL, automatic positive/negative polarity
compatible
During YP
BPR input:
Y: 1.0 V [p-p] (Including sync), 75 Ω
P
B, PR : 0.7 V [p-p], 75 Ω
Others
Removing
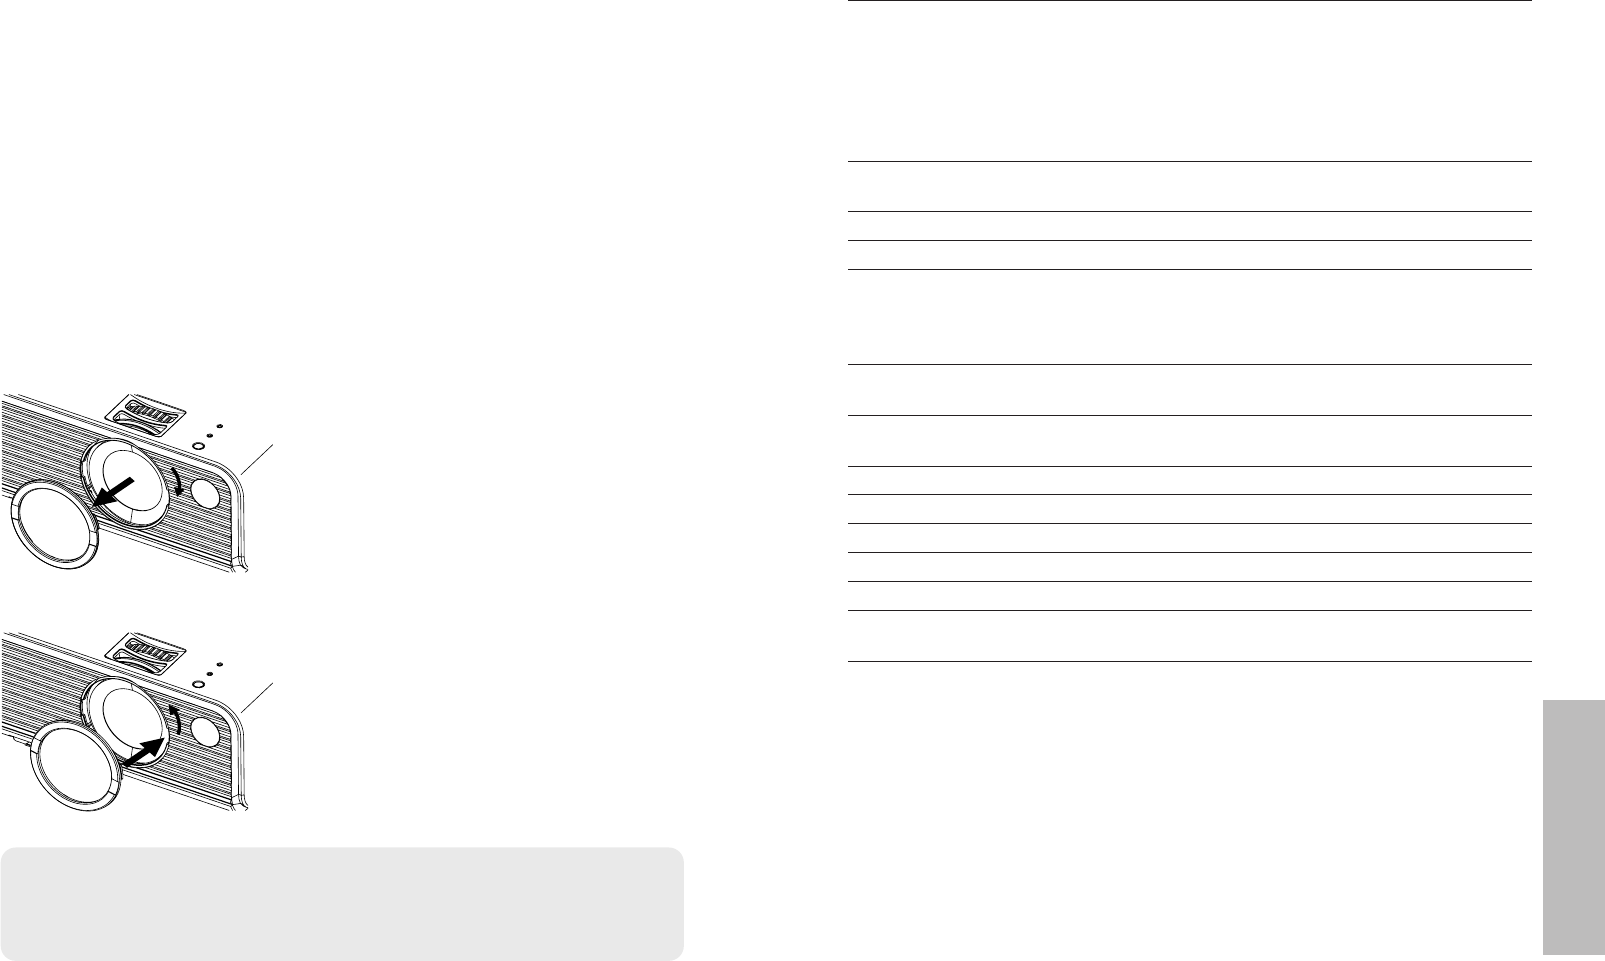
Removing and attaching the lens cover
BTurn the ring to the right and remove the
lens cover.
Attaching
BReplace the lens cover and turn it to the
left to lock it in place.
Before carrying out cleaning and maintenance, be
sure to disconnect the power cord plug from the
wall outlet.
Wipe the cabinet with a soft, dry cloth.
If the cabinet is particularly dirty, soak the cloth in water with a small amount
of neutral detergent in it, squeeze the cloth very well, and then wipe the
cabinet. After cleaning, wipe the cabinet dry with a dry cloth. If using a
chemically-treated cloth, read the instructions supplied with the cloth before
use.
Do not wipe the lens or the lens cover with a cloth that is dusty or
which produces lint.
If any dust or lint gets onto the lens or the lens cover, such dust or lint will be
magnified and projected onto the screen. Use a blower to clean any dust and
lint from the lens and the lens cover surface, or use a soft cloth to wipe off
any dust or lint.
Cleaning and maintenance
NOTE:
BThe lens cover is made of glass, so dropping it or allowing it to hit hard
objects may cause it to break. Be careful when handling the lens cover
BUse the projector with the lens cover attached.


