


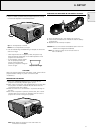

7. INSTALLATION
Connecting to audio equipment/Connecting to an external monitor
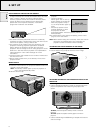
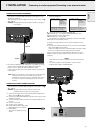
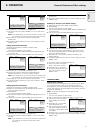
CONNECTING TO AUDIO EQUIPMENT
General
– The figures in brackets
(1)
correspond to the figures in the
diagram on page 10.
The characters in brackets
(a)
correspond to characters in
fig.
2
on page 3.
–
Caution: Always switch off the projector before making any
connections.
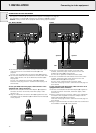
• Connect the AUDIO IN L/R sockets of an amplifier or stereo
system to the AUDIO OUT socket
(g)
of the projector.
For this, use an
(optional)
audio connection cable.
Insert the white plug into the L socket and the red plug into
the R socket.
Note: When the projector is connected to an external audio
amplifier, you cannot control the volume via the
projector or the remote control. However, the sound
can still be muted via the projector or the remote
control.
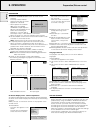
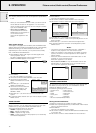
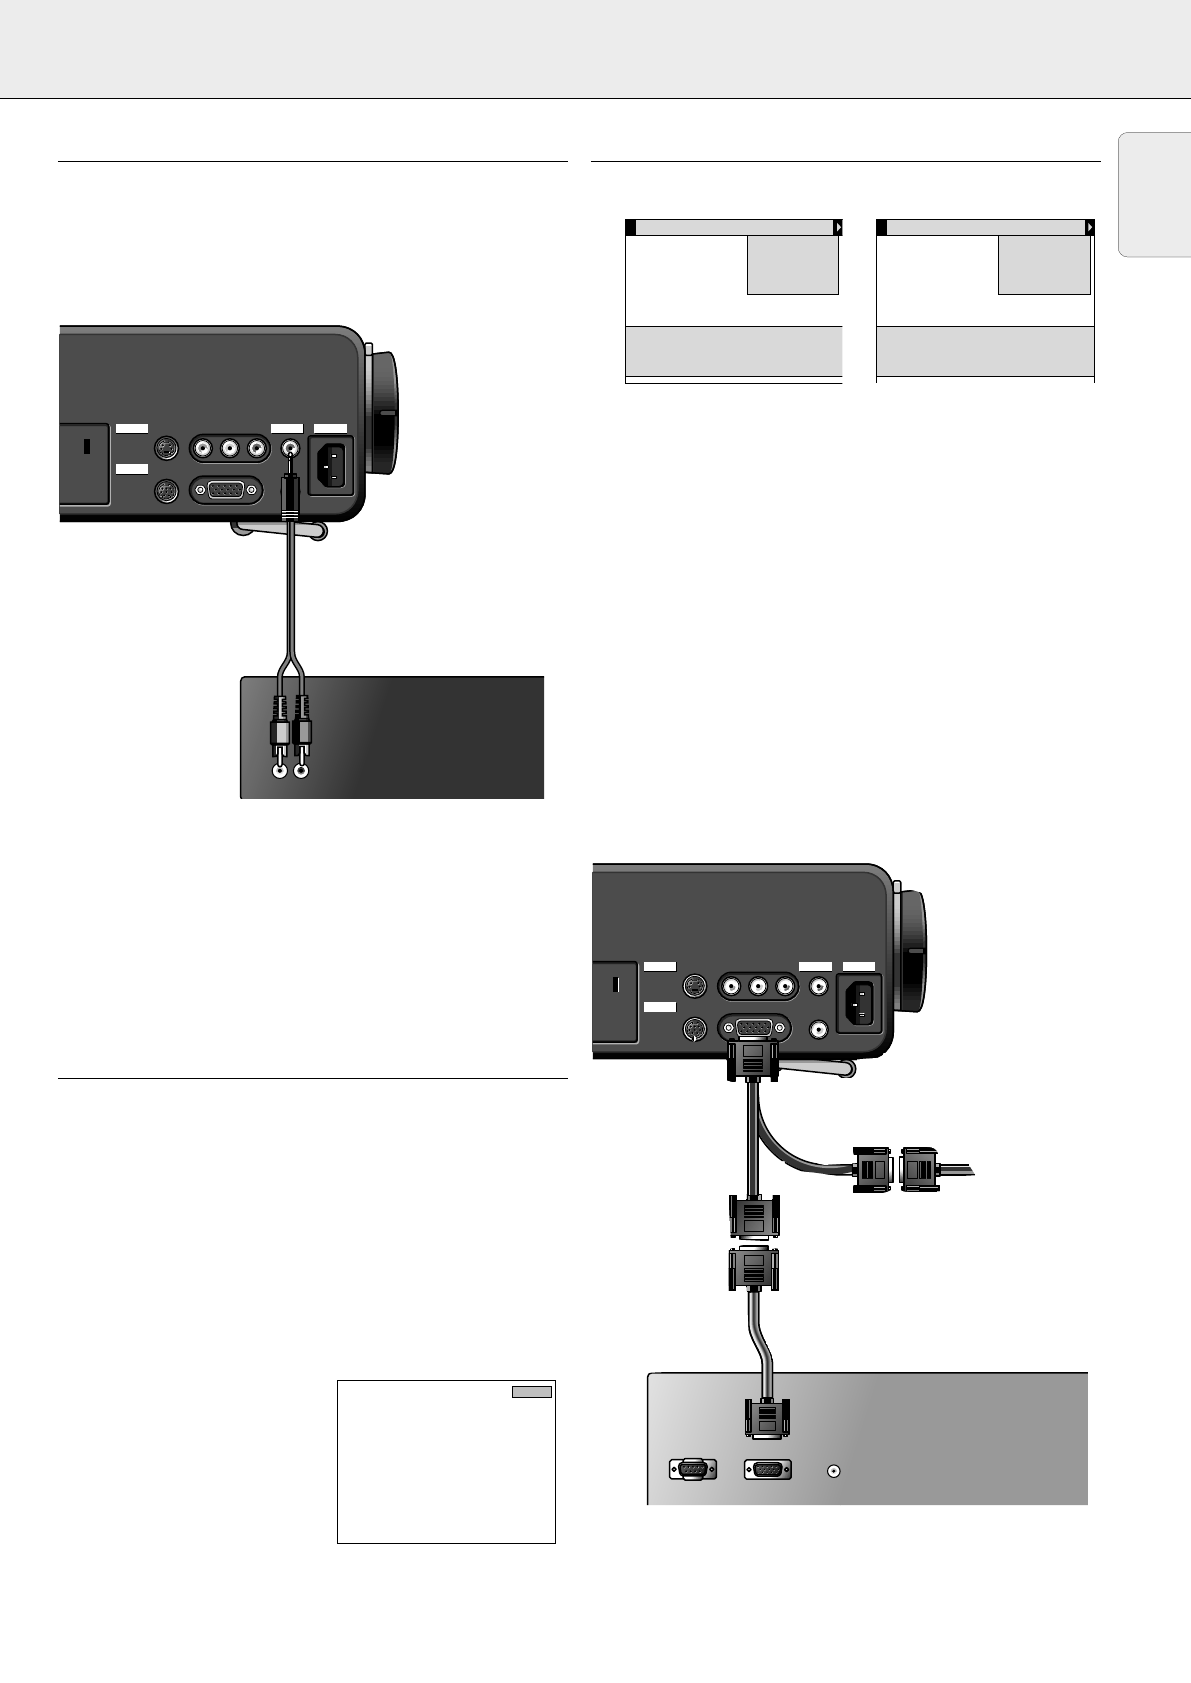
CONNECTING TO AN EXTERNAL MONITOR
General
The characters in brackets
(a)
correspond to characters in
fig.
2
on page 3.
–
Caution: Always switch off PC, external monitor and
projector before making any connections.
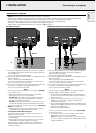
1.
Connect the single end of the optional (VGA) Y-cable to the
data in socket
(b)
of your projector.
2.
Connect the VGA cable between the PC and one of the free
Y-cable connectors.
3.
Connect the last Y-cable connector to the VGA cable of the
monitor.
4.
Switch on your PC.
5.
Switch on the projector.
6.
Press DATA to select data input.
– DATA appears on the screen.
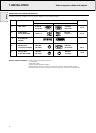
7.
Press MENU.
– The menu bar appears on the
screen.
8.
Use Cursor Control to select SOURCE in the menu bar.
– DATA is highlighted.
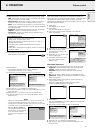
9.
Use Cursor Control to select MONITOR OUT.
10.
Press OK (–/––) to activate the
MONITOR OUT
item.
11.
Use
Cursor Control
to select ON.
12.
Press
OK (–/––)
to activate.
– The projector will indicate the necessity to connect the Y-cable.
13.
Switch on the external monitor.
To obtain the audio signal on the monitor instead of on the
projector:
•
Connect the AUDIO IN sockets of the monitor to the AUDIO
OUT socket
(g)
of the projector.
Insert the white plug of the
(optional)
audio connection cable
into the L socket and the red plug into the R socket.
Some monitors have a single AUDIO IN socket for which a
different audio connection cable with a 3,5 mm mini jack is
required.
Notes:
–
One external monitor or projector can be connected at a
time.
–
For further details on the operation with On Screen
Displays see chapter ‘8 OPERATION’.
PC
1
Monitor cable
Mouse Data in
S-Video in Video in Audio
out
Audio
in
LR
Mouse Data in
S-Video in Video in Audio
out
Audio
in
LR
Power
Data
AudioVideo
Audio out
Data out
Mouse
Projector
Optional
(male)
(female)
(male)
(male)
(male)
(female)
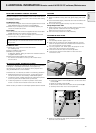
Display
Source
Data
Video
S-Video
Auto start
Monitor out
Audio
On Off
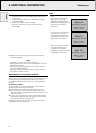
Please connect Y-cable
Use cursor control to select
Press OK or — to accept
√
√
Display
Source
Data
Video
S-Video
Auto start
Monitor out
Audio
√
Use cursor control to select
Press OK or — to invoke item
Press MENU to exit menu
:Currently selected source
√
Data
Projector
Amplifier
Optional
r
Mouse Data in
S-Video in Video in Audio
in
Audio
out
LR
Mouse Data in
S-Video in Video in Audio
in
Audio
out
LR
Power
Data
AudioVideo
L Audio R
in
L Audio R
in
Projector
13
English