


User Manual BDL3215E / BDL4225E
37
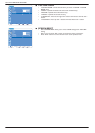
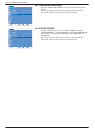
Ê IR CONTROL
Selects the operation mode of the remote controller when multiple BDL3215E/
BDL4225E monitors are connected via RS-232C.
The item in this menu will be effective by pressing “SET” button on the selected
item.
“NORMAL”: The monitor will be controlled normally by the remote controller.
´35,0$5<µ7KHÀUVW%'/(%'/(PRQLWRURIWKRVHPXOWLFRQQHFWHG
via RS-232C is designated as “PRIMARY”.
´6(&21'$5<µ%'/(%'/(PRQLWRUVRWKHUWKDQWKHÀUVWRQHPXOWL
connected via RS-232C are designated as “SECONDARY”.
“LOCK”: Disable the monitor control by infrared remote controller.
Keep pressing “DISPLAY” button for 5 sec or more, this setting will return to
“NORMAL”.
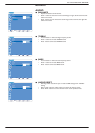
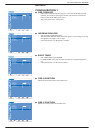
Ê KEYBOARD CONTROL
Selects the operation mode of the keyboard control.v
Select “YES” to disable the function of keyboard.v
Select “NO” to enable the function of keyboard.v
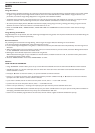
Ê TILING
“TILING” demonstrates multiple screens. This feature provides a single large v
screen using up to 25 monitors.
It will be able to divide up to 5 each horizontal and vertical.v
This requires you to feed the PC output into each of the monitor through a v
distributor.
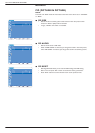
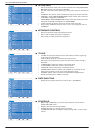
“H MONITORS”: Selects the number of horizontal divide.v
“V MONITORS”: Selects the number of vertical divide. v
“POSITION”: Selects the position to expand the screen.v
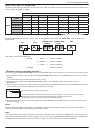
“FRAME COMP”: Works in tandem with “TILING” to compensate for the v
width of the tile bezels in order to accurately display the image.
“ENABLE”: Selects “YES”, the monitor will expand the selected position. v
PIP will be disabled when “TILING” is activatev
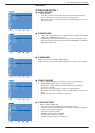
Ê DATE AND TIME
Adjusts the current date and time for internal clock. “SCHEDULE”.v
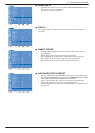
Ê SCHEDULE
Before using “SCHEDULE”, set current time and date for internal clock in v
“DATE AND TIME” menu.
Programs the monitor’s working schedule.v
Schedule the power on / off time of the input source.v
“SCHEDULE” OSD will not disappear except pressing “EXIT” on the remote v
control.
set: exit: menu:
ADVANCED OPTION
INPUT RESOLUTION
GAMMA SELECTION
SCAN MODE
SCAN CONVERSION
FILM MODE
IR CONTROL
KEYBOARD CONTROL
TILING
DATE AND TIME
SCHEDULE
MONITOR ID
DDC/CI
SMART POWER
ADVANCED OPTION RESET
Sel Adjust Enter BACK Quit
ON
AUTO
OFF
set: exit: menu:
ADVANCED OPTION
INPUT RESOLUTION
GAMMA SELECTION
SCAN MODE
SCAN CONVERSION
FILM MODE
IR CONTROL
KEYBOARD CONTROL
TILING
DATE AND TIME
SCHEDULE
MONITOR ID
DDC/CI
SMART POWER
ADVANCED OPTION RESET
Sel Adjust Enter BACK Quit
ON
AUTO
OFF
set: exit: menu:
ADVANCED OPTION
INPUT RESOLUTION
GAMMA SELECTION
SCAN MODE
SCAN CONVERSION
FILM MODE
IR CONTROL
KEYBOARD CONTROL
TILING
DATE AND TIME
SCHEDULE
MONITOR ID
DDC/CI
SMART POWER
ADVANCED OPTION RESET
Sel Adjust Enter BACK Quit
ON
AUTO
OFF
set: exit: menu:
ADVANCED OPTION
INPUT RESOLUTION
GAMMA SELECTION
SCAN MODE
SCAN CONVERSION
FILM MODE
IR CONTROL
KEYBOARD CONTROL
TILING
DATE AND TIME
SCHEDULE
MONITOR ID
DDC/CI
SMART POWER
ADVANCED OPTION RESET
Sel Adjust Enter BACK Quit
ON
AUTO
OFF
set: exit: menu:
ADVANCED OPTION
INPUT RESOLUTION
GAMMA SELECTION
SCAN MODE
SCAN CONVERSION
FILM MODE
IR CONTROL
KEYBOARD CONTROL
TILING
DATE AND TIME
SCHEDULE
MONITOR ID
DDC/CI
SMART POWER
ADVANCED OPTION RESET
Sel Adjust Enter BACK Quit
ON
AUTO
OFF