


8
4.2 Grounding Solutions
To avoid damage to the host computer, I
2
C adapter, or target system, follow these
instructions:
• Wear an earth grounded wrist strap, or discharge any static charge build-up,
when handling the I
2
C adapter or any target system devices.
• Ensure that both the host computer and target system are connected to a common
earth ground point.
• Make sure that all interconnections are made BEFORE applying power to the
host computer, I
2
C adapter, and target system.
• If you are using a laptop computer or host computer that is NOT connected to
mains earth ground, make a hard-wired connection from the host computer (i.e.,
port connector shell) and the target system ground connector to a common earth
ground point.
• Avoid plugging and unplugging system components while the host computer or
target system is powered.
• Ensure that any devices connected to the target system are properly grounded to
the common earth ground point.
• If unsure how to properly ground system components, seek electrical expert help.
WARNING: Any damage caused by Electrostatic Discharge (ESD) through
inadequate earth grounding is NOT covered under the warranty of this product.
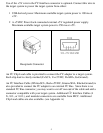
5 Hardware Set-Up
This section provides information on connecting the I
2
C adapter to your host
computer and I
2
C Bus target system.
1. Attach the iPort DLL/USB adapter to a free USB port on your host computer
or self-powered USB hub. If this is the first time the iPort DLL/USB is
connected to the host computer, the Windows Hardware Wizard will appear.
Follow the on-screen directions. The required driver files can be found in the
root-directory of the iPort Utility Pack for Windows CD, and after iPort
Utility Pack software installation, in the installed iPortDLLUSB Driver folder.
NOTE: The Hardware Wizard may run multiple times to install the iPort
DLL/USB VCP driver, and the iPort DLL/USB device. If the Hardware
Wizard warns that the driver files is not certified, press continue.