


Installation
8
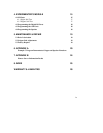
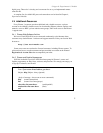
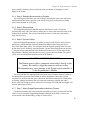
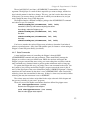
Figure 2-1. Pioneer 1 microcontroller card
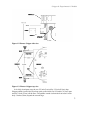
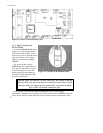
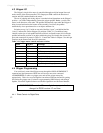
3.1.3 Step 3: Replace the
PSOS EPROM
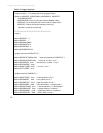
Locate the EPROM/SRAM socket
(Figure 2-2) on the microcontroller
card and note that the Pin 1 locator
notch on its case is towards the outer
edge of the board—you’ll want to
similarly position the new PSOS
EPROM.
Pry or pull out the socketed
EPROM chip. We’d prefer that you
use a special “chip-puller” tool, but
if one isn’t handy, use a thin, flat-
bladed screwdriver and gently pry
up each end of the chip until it lifts
out of the socket freely.
EPROM chips are sensitive to static electricity. Be careful to handle
them by their case and store them on conductive foam. Don’t touch
the pins with your fingers, and be particularly careful not to bend
any of their 28 delicate connector pins.
Now carefully remove the new PSOS EPROM that came with the Gripper/
Experimenter’s Module from its protective foam and insert it into the EPROM socket. Be
sure to line up the Pin 1 notch and insert the pins in their respective socket holes. Then
Figure 2-2. Location of the EPROM socket