27
* See Appendix C for replacement Cleaning Rollers.
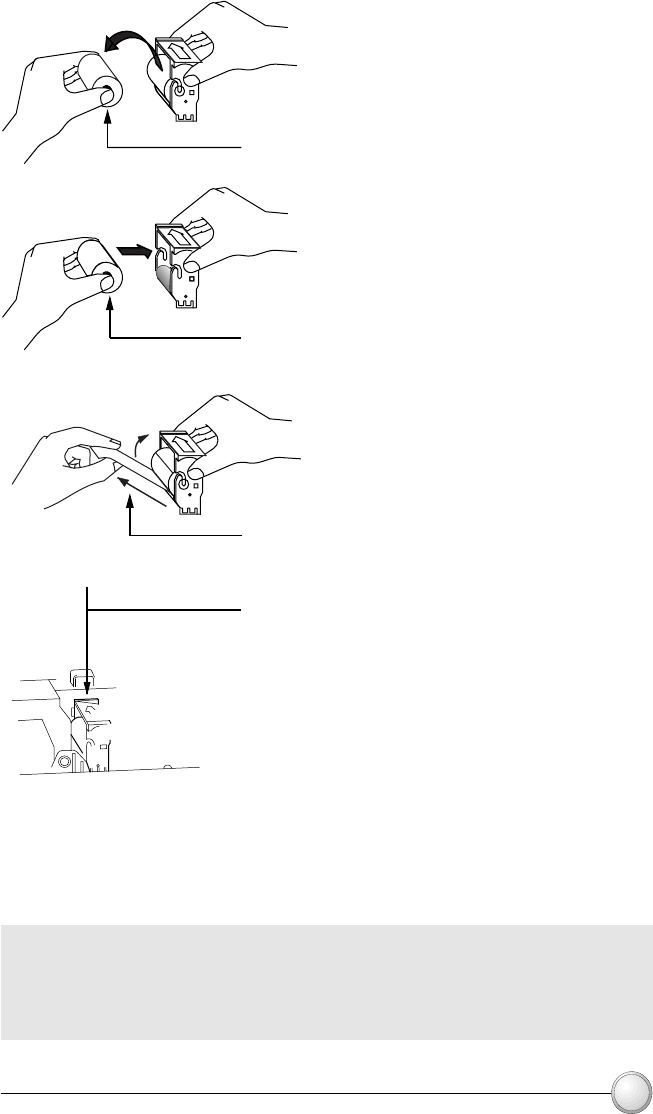
SLOT
Although the CLEAN PRINTER message is
displayed until maintenance has been
performed, the printer will continue to operate.
5. Carefully peel off wrapper from new
Cleaning Roller while in Cartridge.
6. Replace Cartridge into printer. Make sure
the arrow on top of the assembly is facing
toward the rear of the printer. Hook assembly
into slot on printer and rotate down. Ensure
the assembly locks in place.
DO NOT touch the roller surface that con-
tacts the cards.
7. Close Cover
4.Install new Cleaning Roller into Cartridge*.
To avoid contamination, always hold the
Cleaning Roller assembly by the ends.
3. Remove Cleaning Roller from Cartridge and
discard.
CLEANING


