


8
5 Basic Operation
5-4 Installing a Ribbon Cartridge
NOTICE
• A used ribbon cartridge cannot be reused. Do not attempt to turn over and reinstall a used ribbon cartridge, or to rewind the ink
ribbon and reuse the cartridge.
• If a single-color ink ribbon has been used for printing, do not attempt to print overtop of this with a four-color ink ribbon or an ink
ribbon of a different color.
• Before starting to print, make sure that a ribbon cartridge of the desired color has been installed.
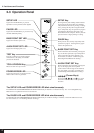
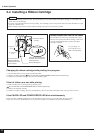
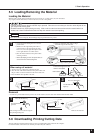
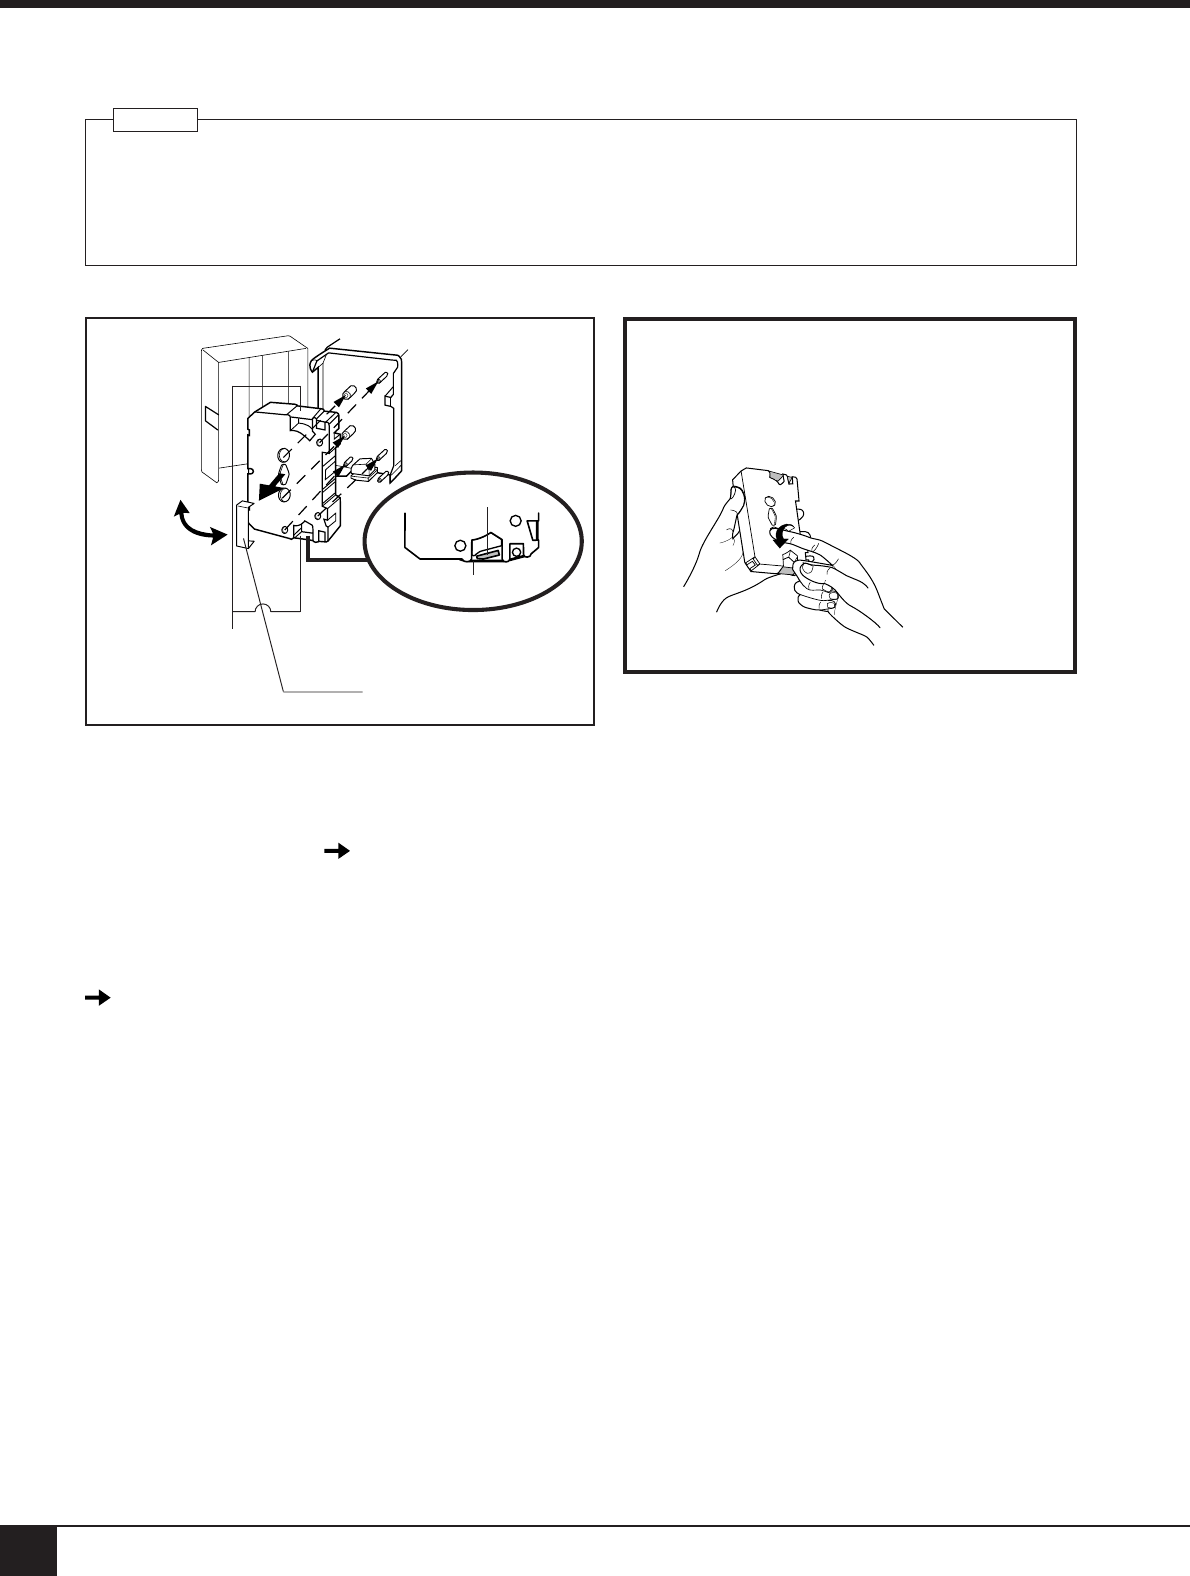
Remove Excess Slack from the Ink Ribbon
The ink ribbon may show some slack when the stopper
has been removed from the ribbon cartridge. If this is the
case, the slack should be taken up before the ribbon
cartridge is installed.
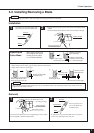
2)Install the ribbon
cartridge.
1) Open the
cover.
Take care to ensure that the
ink ribbon does not catch on
the printing head.
Printing head
Ink ribbon
3) Close the
cover.
Use your finger or a
pen to take up excess
slack in the ink ribbon.
Changing the ribbon cartridge while printing is in progress
1) Press the PAUSE key to stop operation of the PNC-5000.
2) Remove the ribbon cartridge.
The PAUSE LED and POWER/ERROR LED will blink simultaneously.
3) Install the second ribbon cartridge, then press the PAUSE key again.
If the ink ribbon runs out while printing
1) If the ink ribbon runs out during printing, operation stops.
The PAUSE LED and POWER/ERROR LED will blink simultaneously.
2) Remove the old ribbon cartridge.
3) Install a new ribbon cartridge, then press the PAUSE key. (Be sure to install an ink ribbon of the same type as the old one.)
If the PAUSE LED and POWER/ERROR LED blink simultaneously
These two LEDs will blink simultaneously if the ink ribbon has been removed, or if the ink ribbon has been used up.
In this case, remove the old ink ribbon (if one is present) and install a new ink ribbon, then press the PAUSE key.
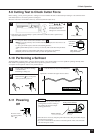
Remove the stopper
Take care to ensure
that the ink ribbon is
not pinched when the
cover is closed.