


» INSTALL 1 Menu
Setting the on-screen menu
This sets the position of the menu, the display format (horizontal or vertical) etc.
Example: Turning the DISPLAY OSD off
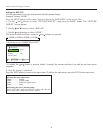
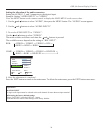
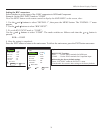
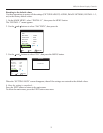
Press the MENU button on the remote control to display the MAIN MENU on the screen, then...
1. Use the
and buttons to select “INSTALL 1”, then press the MENU button. The “INSTALL 1” menu
appears.
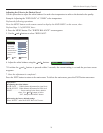
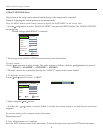
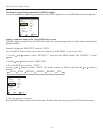
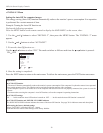
2. Use the and buttons to select “OSD”, then press the MENU button. The “OSD” menu appears.
3. Use the and buttons to select “DISPLAY OSD”.
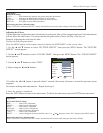
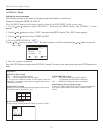
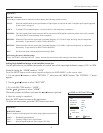
4. To set the DISPLAY OSD to “OFF”...
Use the and buttons to select “OFF”. The mode switches as follows each time the or button is pressed:
ON ↔ OFF
5. Once the setting is completed...
Press the EXIT button to return to the INSTALL 1 menu. To return to the main menu, press the EXIT button once
more.
32
OSD (On Screen Display) Controls
Information
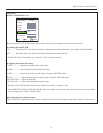
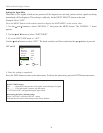
■ DISPLAY OSD settings
ON ........ The on-screen menu appears.
OFF ...... The on-screen menu does not appear.
If you press the DISPLAY button on the remote control for
more than 3 seconds the main menu will appear and can be set
(although it is not ON).
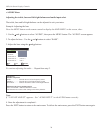
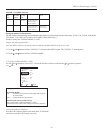
■ OSD ADJUST settings
Adjusts the position of the menu when it appears on the screen.
The position can be set between 1 to 6.
■ OSD ANGLE settings
Sets the display format (landscape “HOR” or portrait “VERT”).
■ OSD ORBITER settings
ON ........ The position of the menu will be shifted
by eight dots each time OSD is displayed.
OFF ...... OSD will be displayed at the same position.
■ Restoring the factory defaults settings
Select “FACTORY” under the INSTALL 1 menu. Note that this
also restores other settings to the factory defaults for Auto
Picture.
1 2 3
4 5 6
OSD
BNC INPUT : COMP
D-SUB TYPE : RGB
RGB TYPE : AUTO
HD TYPE : 1080B
INPUT SKIP : OFF
FACTORY : OFF
NEXT PAGE
INSTALL 1
SEL. ENTER RETURN
MENU/ENTER
EXIT
DISPLAY OSD : OFF
OSD ADJ. : 1
OSD ANGLE : HOR.
OSD ORBITER : OFF
OSD
SEL. ADJ. RETURN
EXIT