Installation
42 Runco VX-40d/-50d/-60d/-80d Owner’s Operating Manual
PRE
L
IMINAR
Y
3.13
Calibrating Projector
Inputs
After you have installed and adjusted the projector and lens (or lenses), you are ready to
begin calibrating the RGBHV input (Input 1) to the VX-40d/-50d/-60d/-80d.
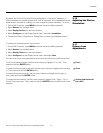
Before proceeding, set the Display Device Input Source to RGB at the DHD Controller
(refer to
Selecting the Input Source on page 36). When finished calibrating Input 1,
repeat the procedure described in this section for Input 2 (DVI), if that input is being used.
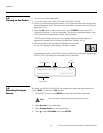
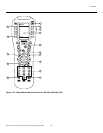
To perform the calibration, you will use the projector rear-panel keypad (Figure 2-3) or
TheaterMaster Remote Control, shown in Figure 3-15 and described on the pages that
follow. Once you have completed the projector input calibration, the end user can use the
DHD Controller Remote Control (
Figure 2-6) to adjust input image quality, change aspect
ratios, switch between sources and more. (The exception to this rule is when sources are
connected directly to the projector. Although this is technically possible, Runco advises
against this.)
Runco calibrates both the VX-40d/-50d/-60d/-80d and DHD
Controller at the factory for optimum performance in most typical
home cinema environments, before the system ships.
Carefully assess the displayed image quality before proceeding with
calibration. In most cases, it is not necessary to calibrate the
projector inputs, as the DHD Controller gives you as much control
as you will need over the image quality.
Only ISF-certified installation technicians should attempt the
calibration procedures described here, and ONLY if absolutely
necessary to accommodate an atypical installation.
Note


