Maintenance_29
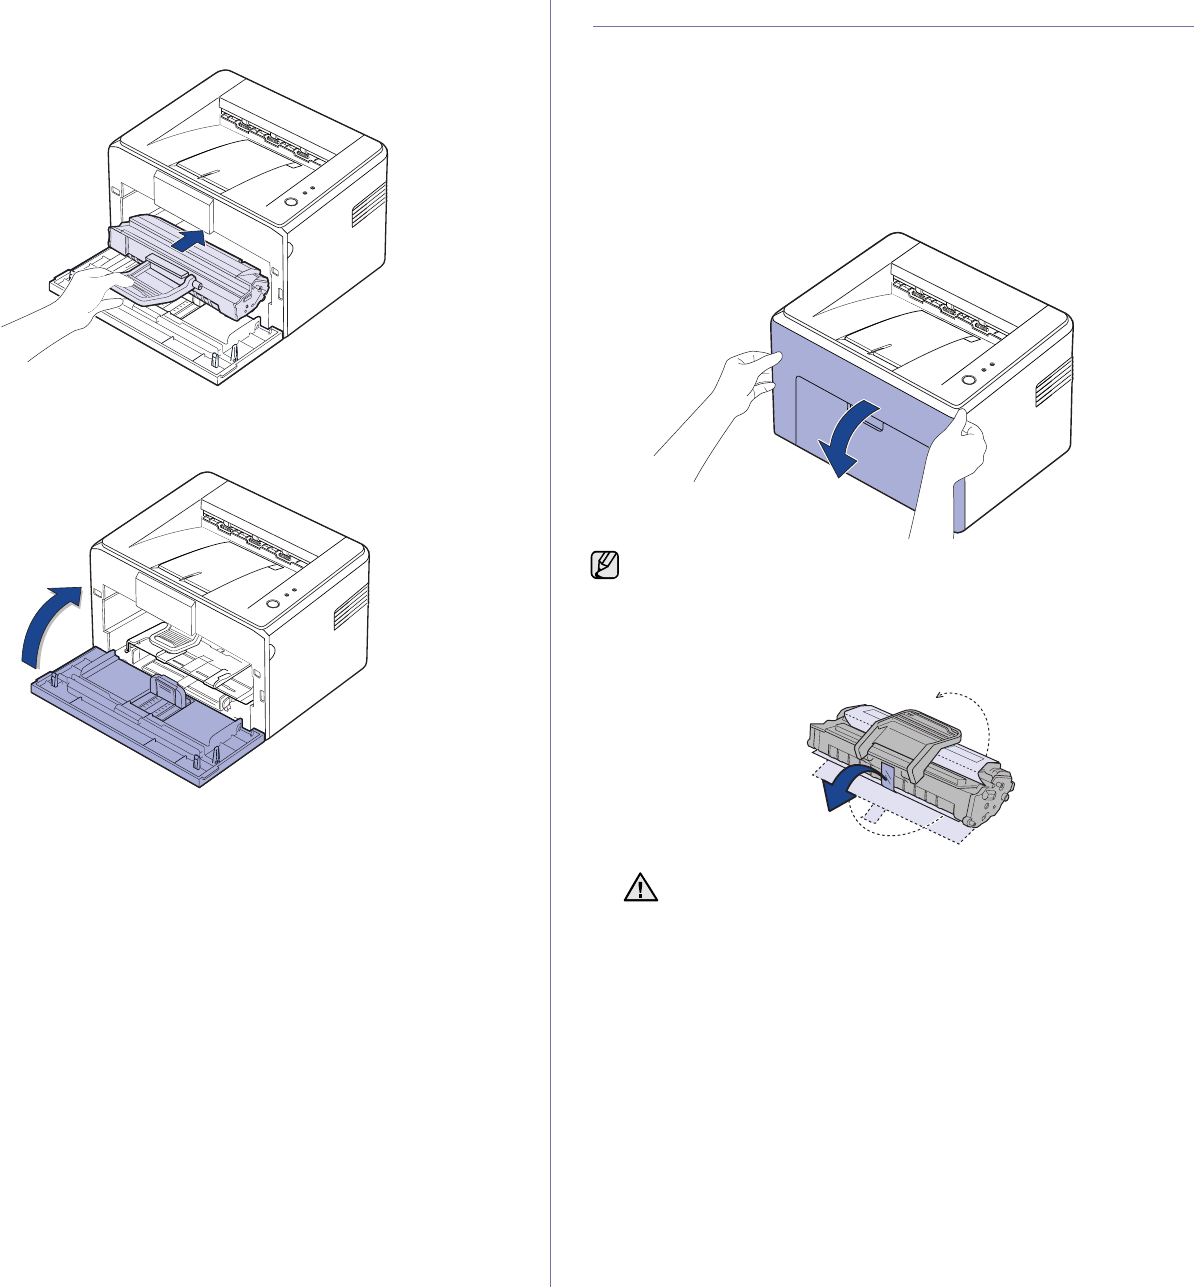
4. Reinsert the toner cartridge into the machine. Ensure that the toner
cartridge snaps into place.
5. Close the front cover. Make sure that the cover is securely closed. If it is
not firmly closed, printing errors may occur when you print.
REPLACING THE TONER CARTRIDGE
When the toner LED lights red, it means the machine cartidge is totally
exhausted. Your machine stops printing.
Also, the Smart Panel program window appears on the computer telling you
to replace the cartridge.
At this stage, the toner cartridge needs to be replaced. Check the type of
toner cartridge for your machine. (See "Supply" on page 40.)
1. Turn the machine off, then wait a few minutes for the machine to cool.
2. Grasp the front cover and pull it toward you to open.
3. Remove the toner cartridge from its bag and remove the paper
protecting the cartridge by pulling the packing tape.
Because the machine is very light, it may be moved when you
use it; for example, when opening/closing the tray or installing/
removing the toner cartridge. Be careful not to move the machine.
• Do not touch the green surface (or sky blue), the OPC drum,
with your hands or any other material. Use the handle on the
cartidge to avoid touching this area.
• Be careful not to expose the green surface (or sky blue), the
OPC drum, into light. This will cause damage to the OPC
drum. Cover the toner cartridge’s OPC drum with paper to
avoid damaging it from the light.
• Do not turn the toner cartridge over.
