


16
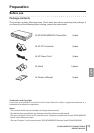
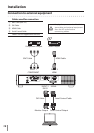
✐ 1(one) HD DATA WIRELESS Receiver Board is available in 1(one) projector.
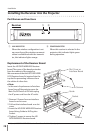
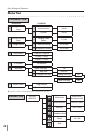
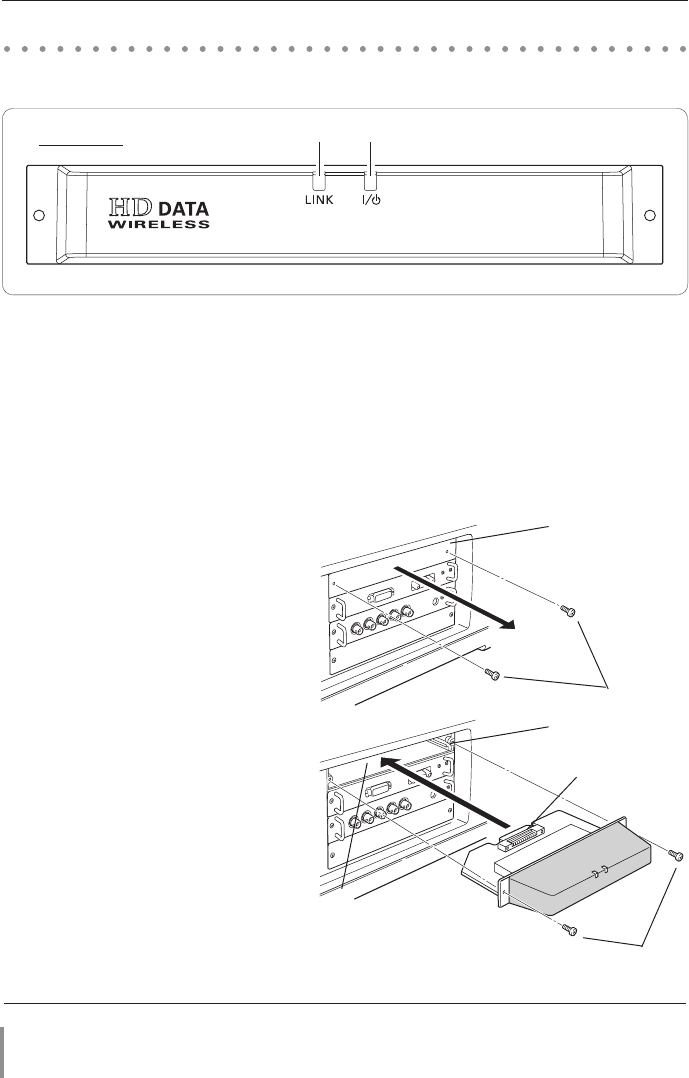
Installing the Receiver into the Projector
Insert the HD DATA WIRELESS Receiver
board. The cover of the board protrudes
from the cabinet of the projector.
We recommend that the HD DATA WIRE-
LESS Receiver board is inserted into the
top slot for preventing influence from
the cables of other slots.
✔Note:
- In the event of replacement of interface
board, turn off the projector, press the
Main On/Off Switch to Off and unplug
the AC power cord from the AC outlet.
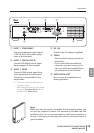
1 Remove 2 Screws from an interface
board or a slot cover.
2 Pull out the interface board. or a slot
cover.
3 Insert the HD DATA WIRELESS Receiver
board along Guide to fit Plug into
Socket.
4 Tighten 2 screws to secure the HD
DATA WIRELESS Receiver board.
Screws
Guide
Socket
Plug
Screws
Receiver
q w
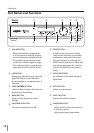
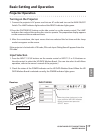
Installation
Part Names and Functions
q
LINK INDICATOR
w
POWER INDICATOR
When the wireless conguration is set
up correctly and the wireless communi-
cation is established with the transmit-
ter, this indicator lights orange.
When this receiver is selected in the
projector, this indicator lights green
during operation.
Slot Cover or
Interface Board
Replacement of the Receiver Board