English
19
HD DATA WIRELESS TRANSMITTER BOX
OWNER'S MANUAL
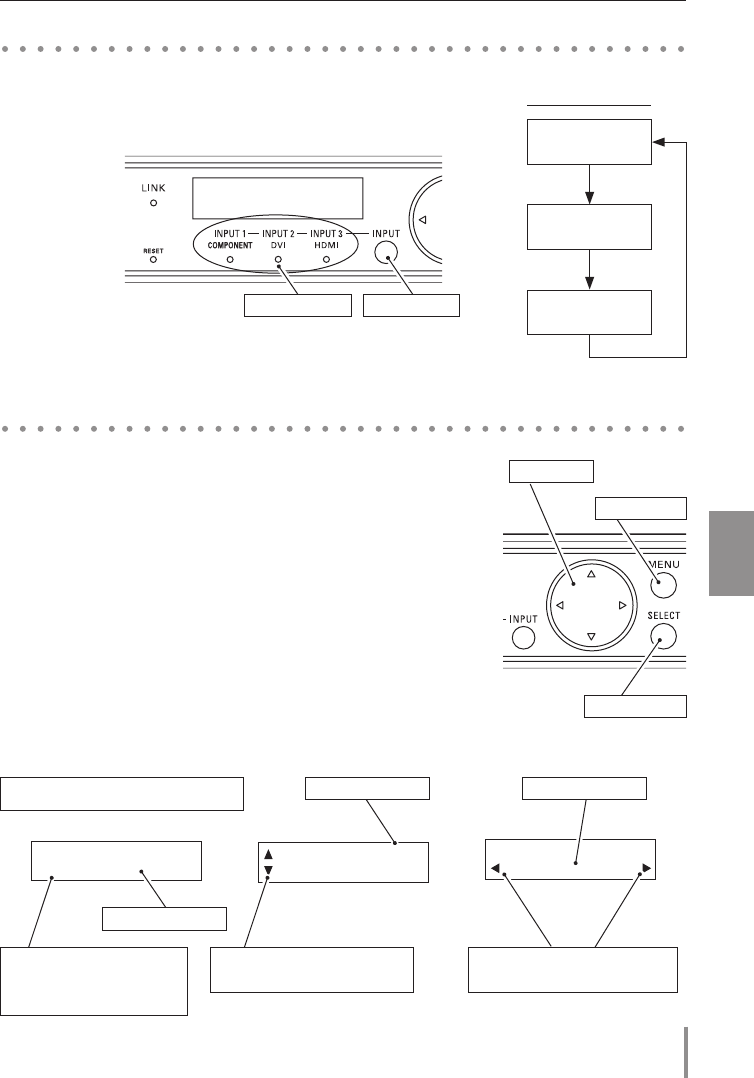
1. Choose either INPUT 1 (COMPONENT), INPUT 2 (DVI) or INPUT
3 (HDMI) by pressing the INPUT button.
2. The Indicator of the selected input lights blue.
✐ "INPUT 3 HDMI" cannot be selected in the Broadcast Mode.
1. Press the MENU button to show the LCD Display.
2. Press the Point
de
buttons to select a Main Menu and press
the SELECT button. A Sub Menu appears on the LCD Display.
3. Press the Point
de
buttons to select a Sub Menu and press
the SELECT button.
✐ Press the point
7
button in a Sub Menu to return to a Main Menu..
4. Press the Point
7 8
buttons to set up or adjust the item data.
5. To quit the Menu, press the MENU button again and Input
Source appears on the LCD Display.
Input Source Selection
INPUT 1
COMPONENT
INPUT 2
DVI
INPUT 3
HDMI
INPUT button
How to Operate the Menu
Basic Setting and Operation
Link Off
RF Freq. **.*MHz
Link On
RF Freq. **.*MHz
Authentication
[Yes] NO
Authentication
Yes [NO]
Authenti- 1/2
cation
ID Number 4/6
Broadcast 1/6
Mode Setup
INPUT SIGNAL >>
[S] <none>
Input Lock Key
[#]### OK
Input Lock Key
#[#]## OK
Input Lock Key
##[#]# OK
Brightness 2/2
Setting
Single
Mode
INPUT SIGNAL >>
<none>
Transmission
[OK] NG
Phase 1/2
Information 3/6
Please wait...
Information 3/6
Key Lock 5/5
Key Lock 5/6
SingleMode 1/6
Initial Setup
Hello
HD Data Wireless
Contrast 1/2
Setting
Mode 6/6
Select
Wireless 3/5
Initial Setup
Wireless 2/5
Setup
Video 1/5
Setup
H Freq. ****
V Freq. ****
H Resol. ****
V Resol. ****
Initialize 2/2 Initialize
[YES] NO
Initialize
YES [NO]
ID Number
****-****
Success
Failure
Image 2/6
Adjust
INPUT SIGNAL >>
[B] XGA 1
Input Lock Key
###[#] OK
Input Lock Key
#### [OK]
INPUT SIGNAL >>
<none>
Broadcast
Mode
INPUT SIGNAL >>
<none>
Transmission
OK [NG]
H Position 2/2
Selected Mode
[B] . . . . . . in Broadcast Mode
[S] . . . . . . in Single Mode
Menu Guide
de buttons are available.
Page Number Bracket [ ]
MENU button
SELECT button
Menu Guide
7 8 buttons are available.
Point button
Examples of LCD Display
Signal Information
INPUT buttonINPUT indicators
