


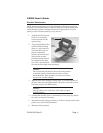

Using the Printer
Printing a Self-test Label
Printing a self-test label checks the printer’s overall operability. To run a
self-test, confirm that the printer is loaded and connected to AC power and
no print jobs are in process. Then:
1. Press and hold in the READY Indicator.
2. Press and release the FEED button.
3. The printer should begin printing a self-test label. Release the READY
indicator after printing starts.
4. After the self-test label finishes printing, press the READY indicator
twice to reset the printer and restore normal operation.
Important!
The printer will be in hex dump mode after printing the
self-test label. It cannot print normal labels in hex dump
mode. The printer will return to normal operation after
you reset it as described in step 4 above.
Feeding Blank Labels
To feed a label, press and release the FEED button with the printer Off-
Line. Press and hold in the FEED button to feed multiple labels.
Label Reprint
If the last label printed has not been cleared from the print buffer by press-
ing the READY indicator to take the printer Off-Line, then pressing the
FEED button will cause the last printed label to be reprinted.
Sending Data To the Printer
To print labels using data sent from a host computer or terminal:
1. Connect the host and printer serial or parallel ports together using a cor-
rectly wired interface cable (see page 16 for wiring information).
2. If you are using the serial port, confirm that the host and printer are us-
ing the same communications parameters.
3. Confirm that the READY indicator is glowing green.
4. Send your data to the printer.
Printer Ready/Standby/Reset Control
The CX200 does not have a power switch, but you can effectively turn it
“off” by pressing the READY indicator. This resets the printer’s microproc-
essor and places the printer in Off-Line. Resetting the microprocessor will:
CX200 User's Guide
PN9001050 Rev.BPage 9