


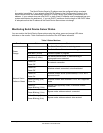
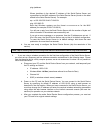

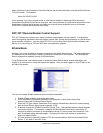

5. Select the appropriate wireless encryption
mode and enter the required settings (check
with your network administrator for the proper
settings if you do not know them). Appendix A
lists the possible encryption settings.
Click the Submit button at the bottom of the
window (you may need to scroll) to save your
changes.
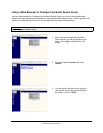
To enter the Authentication Server root
signing certifcate, click on Configure
Authentication Server Certificate
6. Enter the filename containing the CA key
certificate. used for the Authentication Server
public key. Use the browse button if desired.
Click submit to send the certificate to the SX-
500.
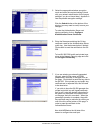
To load SX-500 RSA public and private keys,
return to the Network Security page and click
on Configure Private Key.
7. If you are entering an externally generated
key pair, enter the file name, and PEM
passphrase if required, in the upper form on
the page. Click submit to send the key data to
the SX-500. If the private key and public key
certificate are in separate files, this will need
to be done twice.
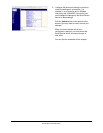
If you wish to have the SX-500 generate the
private key/public key self signed certificate
pair for you, enter the desired information for
the public key certificate in the second form
on the page, and click on submit. When the
generation operation is complete, the public
key certificate may be retrieved by clicking on
one of the links at the bottom of the page, in
order to pass the certificate to the
Authentication Server.
Now click I/O Port on the left side of the
screen to configure the serial port.
Configuring the Serial Device Server Silex Page 17
Part Number 140-00188-210A