


18 | CHAPTER 2 – INSTALLING AND SECURING YOUR SMART BOARD
INTERACTIVE WHITEBOARD
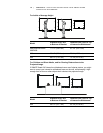
Removing the Pen Tray
You might need to remove the pen tray when you transport or repair your interactive
whiteboard.
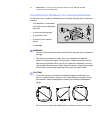
WARNING
There are no user-serviceable parts inside the pen tray. Only qualified personnel
should disassemble the pen tray’s printed circuit boards, and this procedure must
be done with proper electrostatic discharge (ESD) protection.
CAUTION
If dust or small items prevent the pen tray buttons from being pressed or cause
constant button contact, remove the obstructions carefully.
NOTE
You don’t need to wear ESD protection when performing the following procedure.
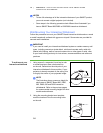
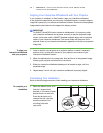
To remove the pen tray 1. Turn off your interactive whiteboard
by disconnecting the USB cable to your
computer or by disconnecting the expansion
module’s power supply, as appropriate.
2. Remove the pens and the eraser from the
pen tray.
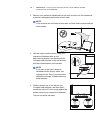
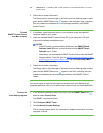
3. Reach under the pen tray and disconnect
the modular cable.
4. If you secured the pen tray to its brackets
using two screws as described in the
previous section, remove these screws.
5. If you secured the pen tray using a Kensington lock or similar device, unlock and
remove the lock.
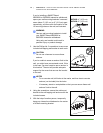
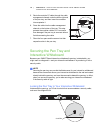
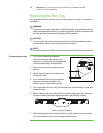
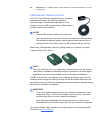
6. Reach under the pen tray and pull down on the two large plastic clips. Because
the ends of these clips project slightly downward, they’re easy to locate.
7. While applying downward pressure to the clips, gently slide the pen tray toward
you until it detaches from the two L-shaped metal brackets.
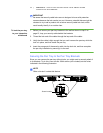
Plastic Clips
The Pen Tray from the Bottom