


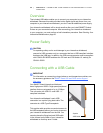


28 | CHAPTER 3 – CONNECTING YOUR INTERACTIVE WHITEBOARD TO YOUR
COMPUTER
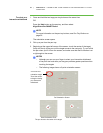
4. Repeat step 3 until you arrive at the last point.
NOTE
If you aren’t satisfied with the precision of a particular point, press the left
arrow key on your computer’s keyboard to repeat the orientation for that point.
5. At the last point, touch the center of the target firmly and continue pressing
until the message “Please wait while Orientation completes” appears.
The orientation screen closes.
The orientation procedure can be 4, 9, 12 or 20 touches, depending on the precision
setting you specify in your SMART Board Settings in the SMART Notebook control
panel. The following procedure shows you how to change the precision setting.
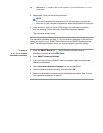
To select a
4-, 9-, 12- or 20-point
orientation procedure
1. Press the SMART Board icon in the Windows notification area or
Mac Dock, and then select Control Panel.
2. Press SMART Hardware Settings.
3. If you have more than one SMART product connected, select the appropriate
interactive whiteboard.
4. Select Orientation/Alignment Settings from the drop-down list.
5. Select the desired orientation setting, and then press OK.
6. Perform an orientation procedure so that the changes take effect. See To orient
your interactive whiteboard on page 27.