Sonic OS 2.x Quick Start Guide
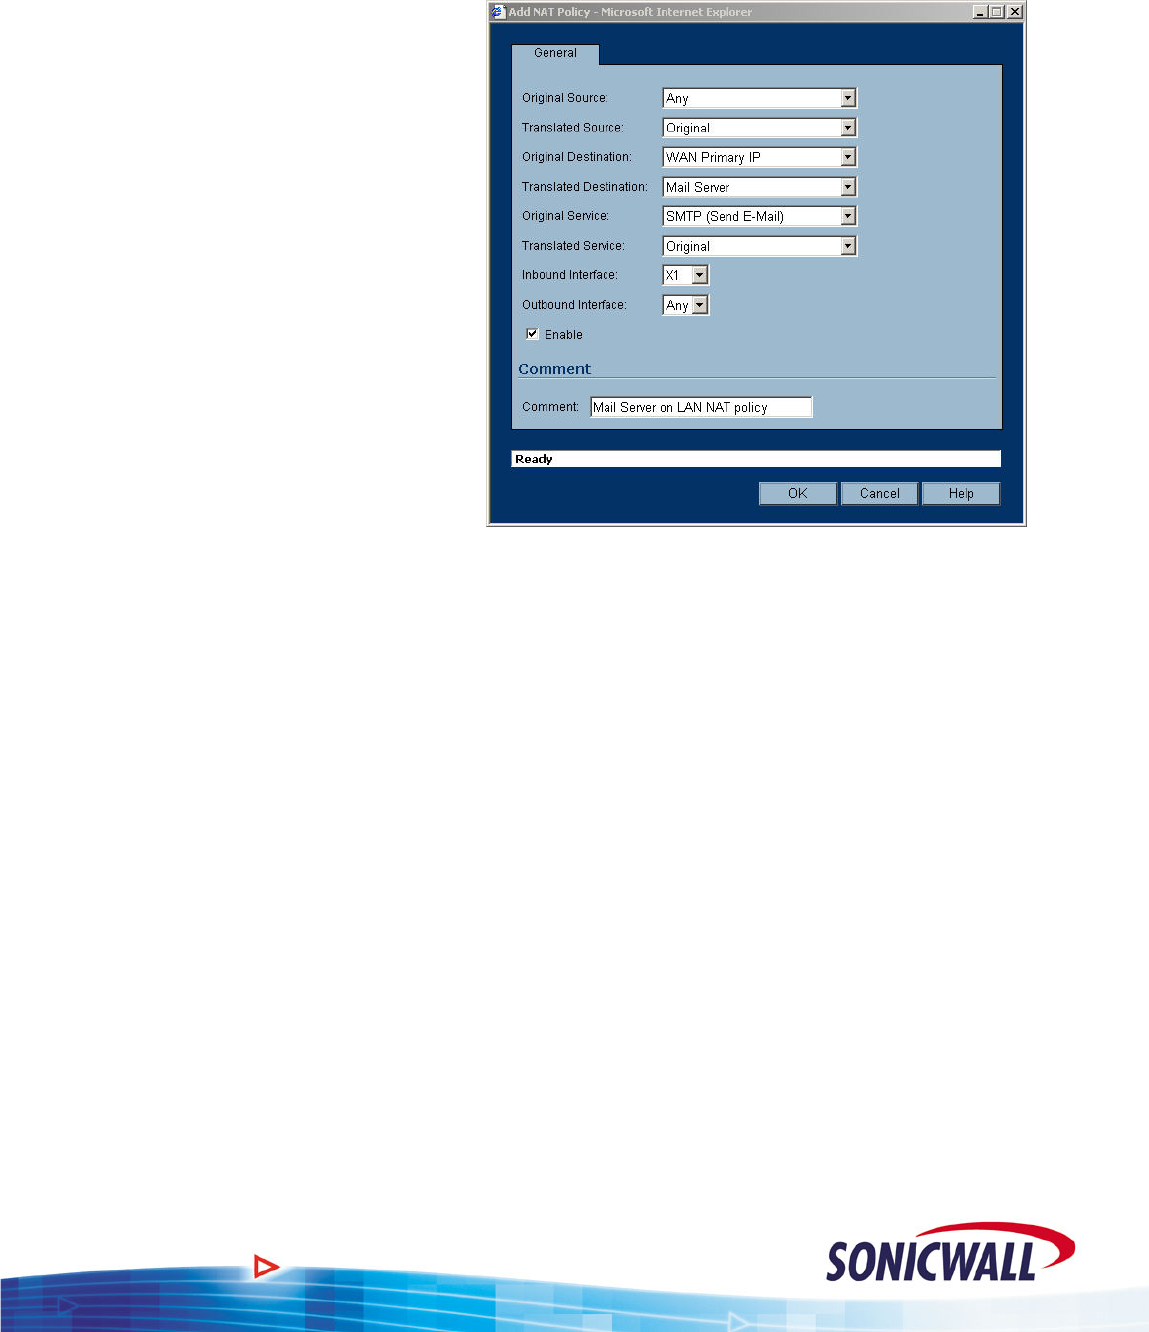
Mail Server NAT Policy:
To create an Inbound NAT policy for our Mail Server:
1. Select the NAT Policies option
under the Network button of the
GUI.
2. Click the ADD button.
3. For Original Source, select ANY.
Allow E-Mail from anywhere on
the Internet.
4. For Translated Source, select
Original. We want to leave the
original source IP address alone.
5. For Original Destination, select
WAN Primary IP. Incoming mail
is being sent to the routable WAN
IP of the Sonicwall.
6. For Translated Destination, select
the Mail Server address object.
This causes the incoming mail to
be routed to the private IP address (192.168.168.4) defined by the Mail Server address
object.
7. For Original Service, select SMTP (Send E-Mail). We only want this translation to work for
E-Mail.
8. For Translated Service, select Original. Our mail server is expecting SMTP on port 25, so
we leave the service as the original, no service translations required.
9. For Inbound Interface, select X1 (the primary WAN).
10. For Outbound Interface, select ANY.
11. Click OK to add the NAT policy.
Mail Server Firewall Policy:
This NAT policy will take any TCP packets coming in on the primary WAN interface that are
destined for port 25, and redirect them to the IP address of the Mail Server. This is a great start to
allowing access to our mail server, but we’re not done yet – next we must specify an Access Rule
allowing the traffic to pass through the firewall.
First, we must ensure that we place the access rule correctly in the Zone matrix. The Zone concept
essentially creates a matrix of rulesets, with each ruleset applying to traffic
from one zone to
another. Since this rule will apply to traffic coming in from the WAN zone and destined for the
LAN zone, we’ll need to edit the appropriate rules as follows:
9
