Sonic OS 2.x Quick Start Guide
While there are many other possibilities for creating Access Rules in SonicOS Enhanced, this
“Public LAN Server” example should give you an understanding of where to start. In this section,
we saved a couple fields for future explanation, so let’s talk about them now:
User Level Authentication and Schedules
Back in the “Objects” section we created an Address Object Group called “Instant Messengers”.
Let’s put this group to use in a rule, and combine it with User-Level Authentication (ULA). This
combination will allow us provide IM services on a user-by-user basis. Then we’ll take it one step
further, and use a schedule to apply the rule during certain days and times only.
NOTE – Before creating the rule, you must first ensure that the user and/or group exist. User
level authentication can be accomplished with either the built-in, internal User database
of the Sonicwall, or via a Radius server.
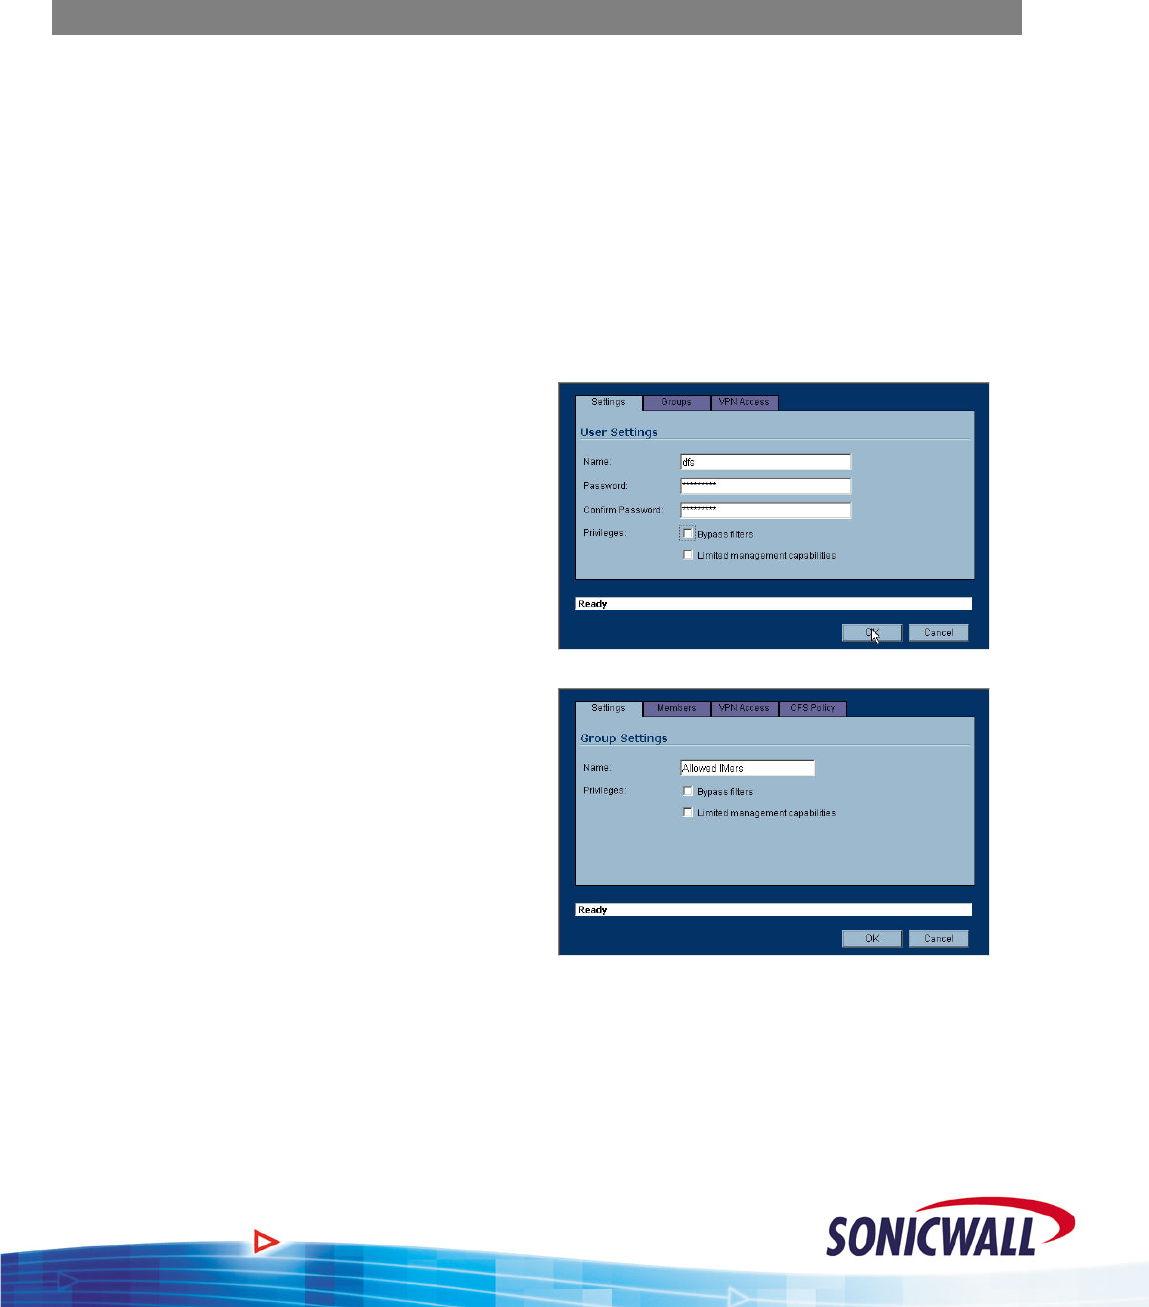
Create User(s) & Group(s):
You can use the following steps to create additional Users and Groups for other purposes, such as
VPN Client access.
To create a User and associated Group:
1. From the GUI, select the USERS option,
and then LOCAL USERS.
2. Click the ADD USER button.
3. Enter the User’s.Name and Password.
Click OK.
4. Repeat the previous steps to create
additional users, as required.
5. Select LOCAL GROUPS and then select
ADD GROUP.
6. Enter a name for the Group (we called
ours “Allowed IMers”).
7. Select the MEMBERS tab.
8. Select the User we previously created and
click the “->” button to make them a
Member of the group. Repeat for
additional Users, as required.
9. Click OK.
Create Firewall Rule:
To create the Firewall rule to limit Instant Messenger usage to only those in the group:
1. From the GUI, select the FIREWALL option.
2. Click the intersection of the LAN (on the left) and WAN (on the top) to display any rules
applicable for outgoing packets from the LAN to the WAN.
11
