11
GB
Customizing Your Monitor
You can make numerous adjustments to your monitor using the
on-screen menu.
Navigating the menu
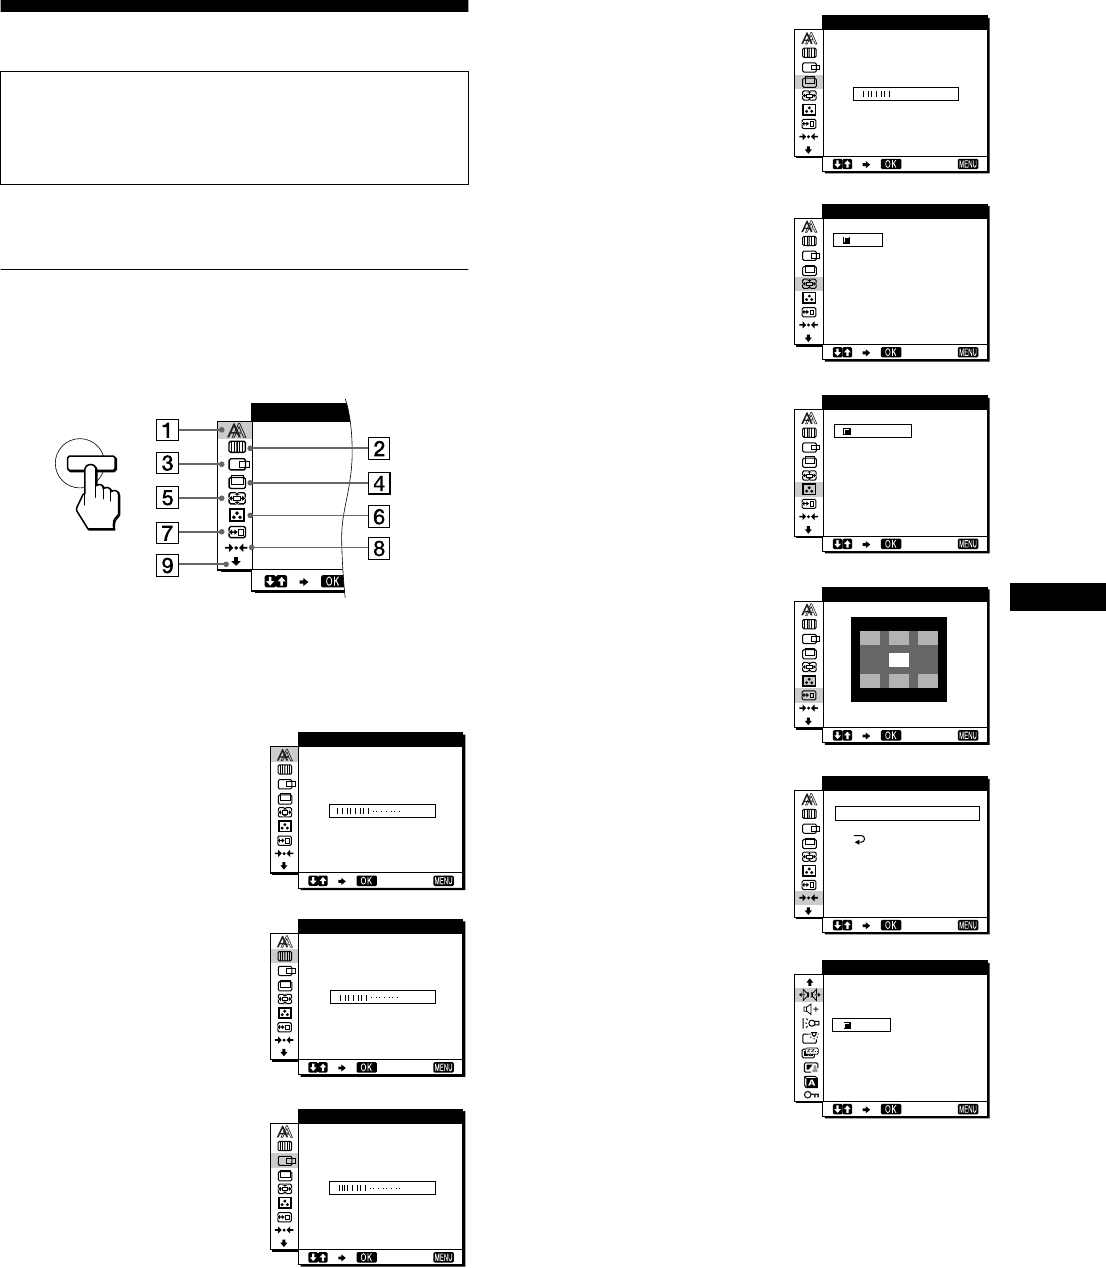
Press the MENU button to display the main menu on your screen.
See page 12 for more information on using the MENU button.
Use the
M
(+)/
m
(–) and OK buttons to select one of the following
menus. See page 12 for more information on using the
M
(+)/
m
(–) and OK buttons.
Before making adjustments
Connect the monitor and the computer, and turn them on.
Wait for at least 30 minutes before making adjustments for the
best result.
1 PHASE (page 13)
Select the PHASE menu to
adjust the phase when the
characters or pictures appear
fuzzy throughout the entire
screen. Adjust the phase after
adjusting the pitch.
2 PITCH (page 13)
Select the PITCH menu to
adjust the pitch when the
characters or pictures are
unclear in some areas of the
screen.
3 H CENTER (page 13)
Select the H CENTER menu
to adjust the picture’s
horizontal centering.
MENU
PHASE
16
EXIT
PHASE
0
EXIT
PITCH
50
EXIT
HCENTER
4 V CENTER (page 13)
Select the V CENTER menu
to adjust the picture’s vertical
centering.
5 ZOOM (page 14)
Select the ZOOM menu to
adjust the picture’s sharpness
according to the input
signal’s aspect ratio or
resolution.
6 COLOR (page 14)
Select the COLOR menu to
adjust the color temperature
of the picture. This adjusts
the tone of the screen.
7 MENU POSITION
(page 14)
Select the MENU
POSITION to change the on-
screen menu position.
8 RESET (page 15)
Select the RESET menu to
reset the adjustments.
9 Option (page 15)
Select
m
(option) menu to
adjust the monitor’s options.
The options include:
• WIDE STEREO
• BASS BOOST
• BACKLIGHT
• LIGHT SENSOR
• POWER SAVE
• USER SENSOR
• LANGUAGE
• MENU LOCK
25
EXIT
VCENTER
ON
OFF
ZOOM
EXIT
9300K
0K
650
5
0
00K
USER
ALDJUST
COLOR
EXIT
MEN NUP
OSI IOT
EXIT
SCREEN
ALL
RESET
RESET
RESET
EXIT
1
2
OFF
WIDE STEREO
EXIT
(continued)
