


Handbook for SXV-M5C Issue 1 August 2004
26
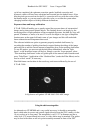
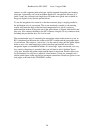
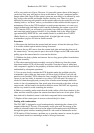
camera, or with a separate guide telescope, rigidly mounted alongside your imaging
telescope. I personally use it with an 80mm aperture F5, inexpensive refractor as a
guide ‘scope, but a shorter focal length lens will make more guide stars available in
any given region of sky (See the picture below).
To use the autoguider, first orient it so that the connector plug is roughly parallel to
the declination axis of your mount. This is not absolutely essential, as the training
routine will learn the angle of the head and compensate for it, but it is easier to
understand the motion of the guide star if the guider frame is aligned with the RA and
Dec axes. Now connect the head to the SXV camera, using the 18 way connector lead,
including the port divider box, if it is to be used.
The recommended way of connecting the autoguider output to the mount is to use an
RJ11 telephone lead between the socket on the SXV camera and the autoguider input
of your mount. This output is ‘active low’ (i.e. the control relays pull the guider inputs
down to zero volts when applying a guide correction) and matches most of the
autoguider inputs on commercial mounts. If ‘active high’ inputs are needed, or a very
low control voltage drop is essential, then you will need to add a Starlight Xpress
‘relay box’ between the guider output and the input to the mount. Please contact your
local distributor if a relay box is required. Some mounts (Vixen, for example) use a
similar guider input socket, but have re-arranged connections. Details are given on our
web pages at the end of the ‘STAR2000’ section.