


Handbook for SXV-M5C Issue 1 August 2004
4
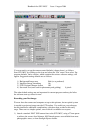
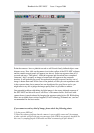
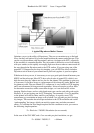
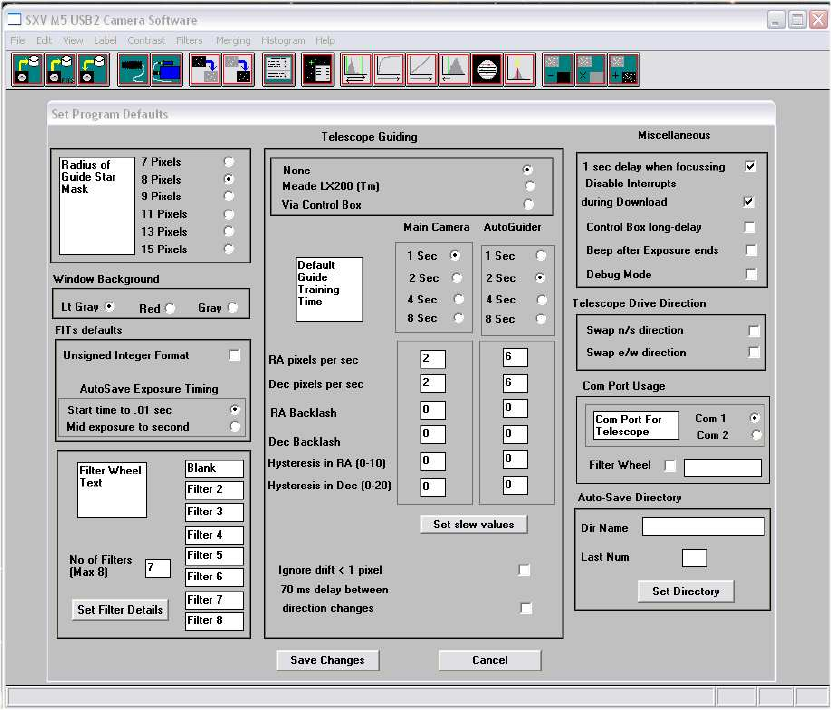
You now need to set up the camera control defaults (shown above), as follows:
Start SXV-M5C by clicking on the icon and select the ‘File’ menu. Now select ‘Set
program defaults’ and a window, which contains the various software settings, will
appear. Suggested starting defaults are as follows:
1) Background Image area Red (or as preferred)
2) Interlaced image smoothing On
3) FITS Unsigned Integer format Off
4) Star mask size (area used for photometry and guiding) 8 pixels
The other default settings are not important for current purposes and may be left as
the software start-up values for now.
Recording your first image:
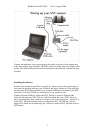
We now have the camera and computer set up to take pictures, but an optical system
is needed to project an image onto the CCD surface. You could use your telescope,
but this introduces additional complications, which are best avoided at this early
stage. There are two simple options, one of which is available to everyone:
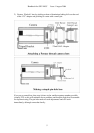
1) Attach a standard ‘M42’ SLR camera lens to the SXV-M5C, using a 27mm spacer
to achieve the correct focal distance. M42 thread spacers are available from most
photographic stores, or from Starlight Xpress dealers.