


2
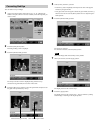
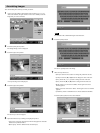
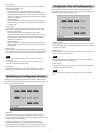
1 At the screen for changing the output size, touch [Shop staff only]. (Refer
to pp. 8, 14, 19, “Selecting the Output Service” in the User’s Guide
(separate booklet).)
The border selection screen opens.
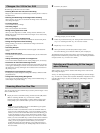
2 Touch the type of border to use.
The standard size borders included in the selected type are listed.
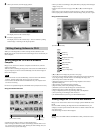
Subsequent procedures are the same as with creative printing. Continue from
Step 4 of the “Creative Printing” procedure in the User’s Guide (separate
booklet). When referring to the User’s Guide, read “Collage Print” as “Printing
in Standard Sizes.”
Changing the Settings
You can use the [Shop staff only] item of the Configuration Utility to change
variables such as the size of the print paper and the unit price. For details about
how to start and end the Configuration Utility, refer to the User’s Guide
(separate booklet).
The settings in the screens of the Configuration Utility can be changed as
described below.
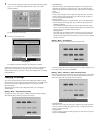
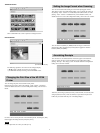
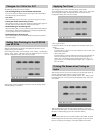
[Setting – Menu – Shop staff only] Screen
To display this screen, at the [Setting – Menu] screen touch [Shop staff only].
Then make the [Shop staff only] output service settings.
• [ON/OFF] Button
When this setting is [ON], [Shop staff only] output service settings can be
selected in the output service selection screen. You can switch this setting
[ON] (settings selectable) or [OFF] (settings not selectable) by touching this
button.
• [Size] Button
Touch to select the paper size for output with [Shop staff only]. Touch this
button to open the paper size selection screen, then touch the [L], [KG], or
[2L] button and touch the [OK] button.
• [Quantity] Button
Touching this button opens a screen that allows you to set the initial number
of prints displayed when [Shop staff only] is selected as the output service.
- [Default Qty] Button
This button sets the default number of prints for [Shop staff only] output
service. A screen for setting the default number appears when this button is
pressed. You can set a number between 0 and 10.
- [MaxQty] Button
This button sets the maximum number of prints that can be output at once
with [Shop staff only] output service. A screen for setting the maximum
number of prints appears when this button is pressed. You can set a number
between 1 and 255.
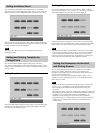
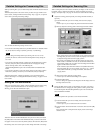
[Setting – Menu – Price] Screen
You can set the unit price of [Shop staff only] output service.
A screen for setting the unit price is displayed when this button is pressed. You
can set the unit price between 0 and 99999999.
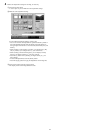
[Setting – Other – Password – Shop staff only] screen
This screen appears when you touch the [Shop staff only] button in the [Setting
– Other – Password] screen. You can use a password that must be entered in
order to use [Shop staff only] output service procedures.
• [ON/OFF] Button
When this is set to [ON], password entry is required when using procedures.
You can switch this setting [ON] (password used ) or [OFF] (password not
used) by touching this button.
• [Setting] Button
Touch to open the screen for entering the password. You can set a password
between 0 and 99999999.
Border types