6
8 When you are done, touch the [Apply] button.
The display returns to the screen at Step 3.
9 Touch the [Apply] button.
The display returns to the screen at Step 1. You can continue by editing
another image or returning to the output operation.
Writing Viewing Software to CD-R
When you write image data to a CD-R, viewing software (Windows) and
HTML files are also written to the CD-R so the images can be viewed easily on
other computers.
Viewing Images on CD-R with a Windows
Computer
Images can be viewed on a Windows computer with CD Viewer (software
written to the CD-R).
When the CD-R containing the image data is inserted into the CD-ROM drive
of your computer, CD Viewer starts automatically and a list of the images on
the CD-R is displayed.
Note
• If CD Viewer does not start automatically, access the CD-R with Windows
Explorer, and then double-click Viewer.exe in the root folder.
• Do not remove the CD-R from the CD-ROM drive of your computer when
CD Viewer is starting.
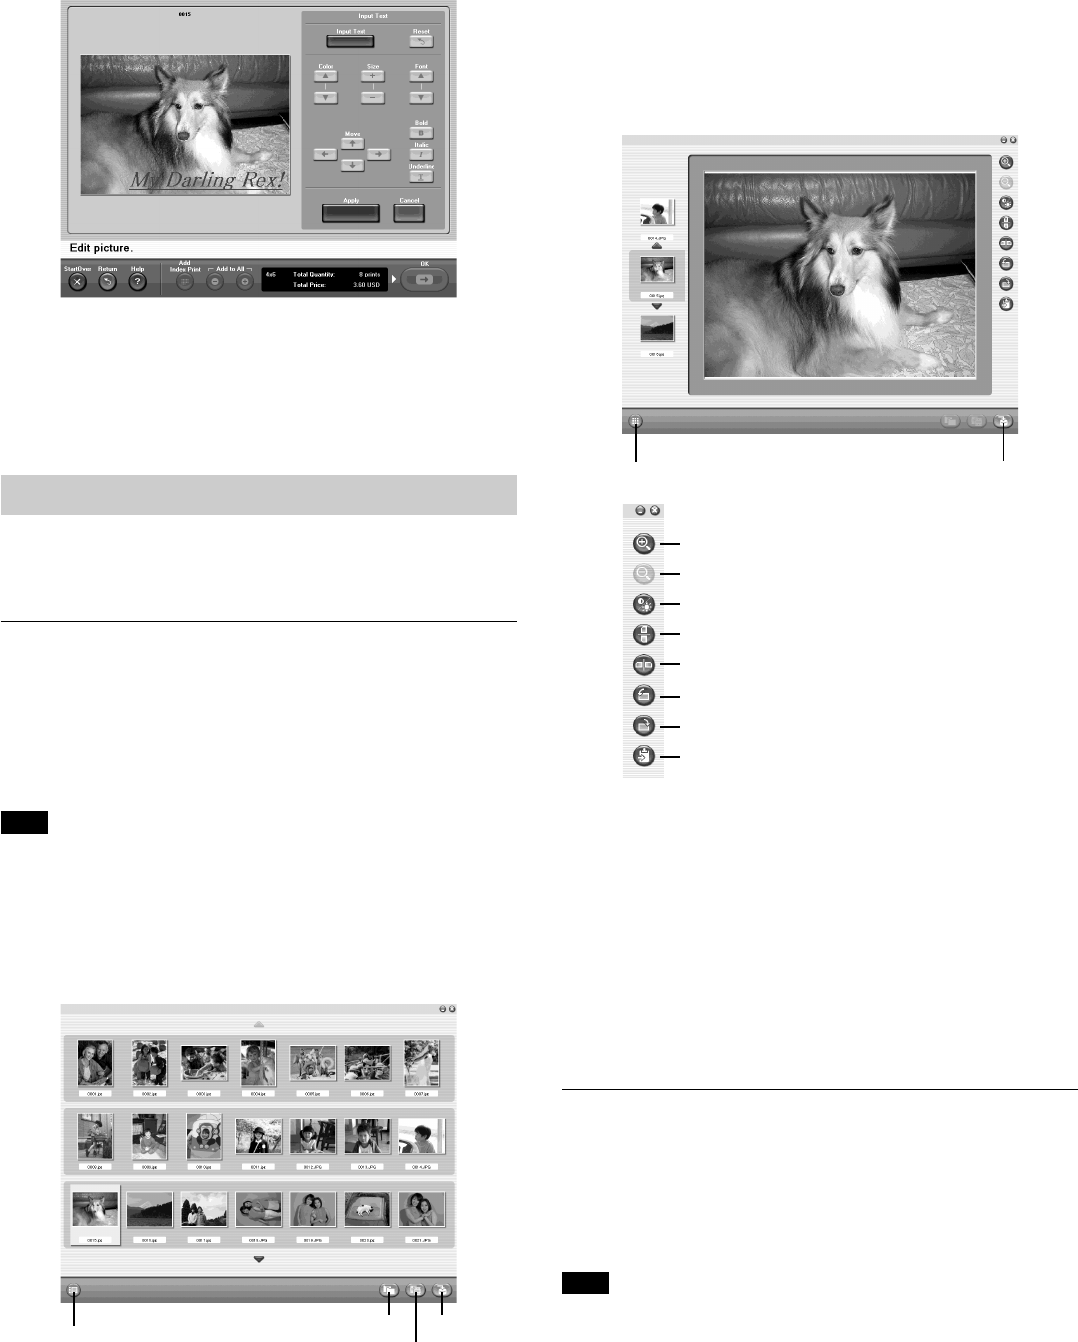
CD Viewer is operated through the [Thumbnail Screen] and [Preview Screen].
Using the Thumbnail Screen
• Double-click an image to preview it, enlarged full screen.
• Click on image to select it. To select several images, hold the Shift or Ctrl
key, and then click the images. After selecting the desired image, click [To
Preview Screen] to preview the image.
• When you select several images, click [Slide Show] to display all the enlarged
images one by one.
• If the list does not fit onto one page, touch [
v
] or [
V
] to scroll through the
pages.
• Click [Save] to give the image a name and save it as a file on your hard disk.
• Click [Open], select a folder, and then select the images that you want to open.
Using the Preview Screen
•[
v
] or [
V
]. Click to display the previous or next page.
• [Zoom in]. Click to enlarge the image. If the image does not fit in the display
area, drag the image with the mouse to scroll through the display area.
• [Zoom out]. Click to reduce the image.
• [Brightness/Contrast]. Click to open the image brightness and contrast
adjustment dialog box.
• [Flip vertical]. Click to flip the image vertically.
• [Flip horizontal]. Click to flip the image horizontally.
• [Rotate left]. Click to rotate the image 90° counterclockwise.
• [Rotate right]. Click to rotate the image 90° clockwise.
• [Copy to clipboard]. Click to copy the image data to the Clipboard.
• [Save]. Click to give the image a name and save it.
• [To Thumbnail Screen]. Click to go to the Thumbnail screen.
Viewing Images on CD-R with a Web Browser
Images can be viewed with a Web browser. Simply open the HTML file on the
CD-R.
Insert the CD-R containing the image data into the CD-ROM drive of your
computer, and then open the index.htm file in the root folder of the CD-R with
your Web browser.
A list of the image on the CD-R is displayed.
Note
Do not remove the CD-R from the CD-ROM drive while your Web browser is
starting.
[Zoom out]
[Zoom in]
[Brightness/Contrast]
[Flip vertical]
[Flip horizontal]
[Rotate right]
[Copy to clipboard]
[Rotate left]
[Save][To Thumbnail Screen]
[To Preview Screen]
[Slide Show]
[Save][Open]


