


RamSan-500 User’s Manual 18 of 48
To set up the network via the front panel, use the arrow buttons to cycle
through the top-level menu options until the display shows “Network
Config”. Use the Select button to choose this option and continue with
the configuration. You may now use the arrow buttons to scroll through
the following menu options:
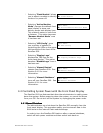
Network Config
Show Current Config
Displays a list of the current IP
configuration, hostname, IP
address, subnet mask, gateway
address (if applicable), and
hardware Ethernet address.
Network Config
Set IP Config
To continue setting up the
Ethernet configuration.
Network Config
Restart Network
Shuts down and restarts the
Ethernet port using the current IP
assignment configuration.
Network Config
Exit Menu
Exits the setup menu.
Use the arrow buttons to scroll up and down through the list. To continue
setting up the Ethernet configuration, select “Set IP Config”.
After selecting “Set IP Config”, you may use the arrow buttons to cycle
through:
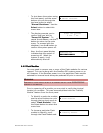
Set IP Config
Static
Enables you to set a static IP
address for the RamSan.
Set IP Config
DHCP
Sets the IP configuration to
DHCP
Set IP Config
None
Disables Ethernet
Set IP Config
No change (exit)
Returns to the Main Menu
without making any changes
Talk to your network administrator for the proper IP assignment type. Use
the Select button to select the desired method of IP assignment. If you
did not choose “Static IP” you are asked to confirm the selection with
the ↓
↓↓
↓ button.
To configure the RamSan with a static IP, the system requires the IP
address, subnet mask, and possibly a gateway address.