


2. PRINTER SETUP
ENGLISH VERSION EO1-33028
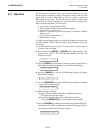
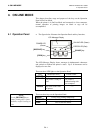
2.11 Test Print
E2-15
2.11 Test Print
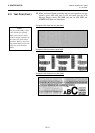
The following test procedure allows you to perform a print test to verify
that the printer is operating correctly. During the running of this test, the
printer will first issue a blank label to allow the sensors to detect the
Black Mark or Label Gap. Then it will print five labels of slanted lines
followed by five labels of sample bar codes and finish by printing five
labels containing characters of various sizes.
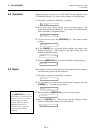
• Issue count = 5 of each kind of label
• Print method = Thermal Transfer (ribbon required)
• Print speed = 4” per second
• Sensor = Transmissive (Feed Gap Sensor) or Reflective (Black
Mark sensor).
• Type of print = Batch (No cut)
• Print Length = 76 mm
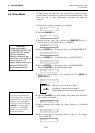
The following paragraphs guide you through the diagnostic procedure for
test label printing. Please follow the step-by-step procedures exactly for
best results.
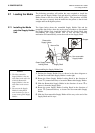
1.
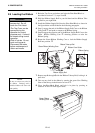
Use label stock for the test print. For best results, use labels that are
76 mm or longer in length.
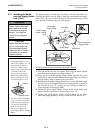
2.
Press and hold the
[FEED]
and
[PAUSE]
keys while turning on the
printer power switch. The LCD Message Display will show the
following message.
3.
Press the
[FEED]
key three times to advance to the test print mode as
indicated by the following message in the LCD Message Display.
4.
Press the
[PAUSE]
key and the LCD Message Display will display
the following message.
5.
Press the
[RESTART]
key and the LCD Message Display will change
to show the following message.
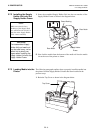
6.
When the media loaded is:
Tag paper utilizing the Black Mark Sensor (Reflective Sensor)
→ Continue on to the next step
7
.
Labels utilizing the Feed Gap Sensor (Transmissive Sensor)
→ Press the
[RESTART]
key again, and proceed to step
10.
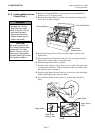
7.
Press the
[PAUSE]
key and the printer will issue one blank label and
will then print five labels of slant lines and the LCD Message Display
will continue to display the following message.
!',$*$
!7(6735,17
35,17&21',7,21
$87235,175()/
$87235,175()/