


2. PRINTER SETUP ENGLISH VERSION EO1-33087
2.4 Connecting the Cables to the Printer
E2- 4
2.4 Connecting the
Cables to the Printer
The following paragraphs outline how to connect the cables from the
printer to your host computer, and will also show how to make cable
connections to other devices. Depending on the application software you
use to print labels, there are four possibilities for connecting the printer to
your host computer. These are:
• A serial cable connection between the printer’s RS-232C serial
connector and one of your host computer’s COM ports.
• A parallel cable connection between the printer’s standard parallel
connector and your host computer’s parallel port (LPT).
• An Ethernet cable connection between the printer’s Ethernet
interface connector and one of your host computer’s Ethernet port.
NOTE:
▪ Use an Ethernet cable conforming to the standard.
10BASE-T: Category 3 or greater
100BASE-TX: Category 5 or greater
Cable length: Up to 100 m segment length
▪ Depending on the operating environment, a communication
error may occur. In that case, you may need to use a shielded
cable (STP) or device matching.
• A USB cable connection between the printer’s USB interface
connector and one of your host computer’s USB port.
NOTE:
▪ When disconnecting the USB cable from the host computer,
follow the “Safely remove hardware” message shown on the host.
▪ Use a USB cable confirming to V1.1 or greater and with a Type
B connecter provided on either end.
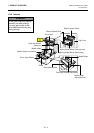
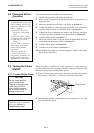
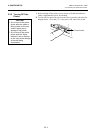
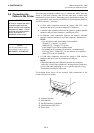
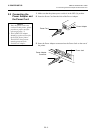
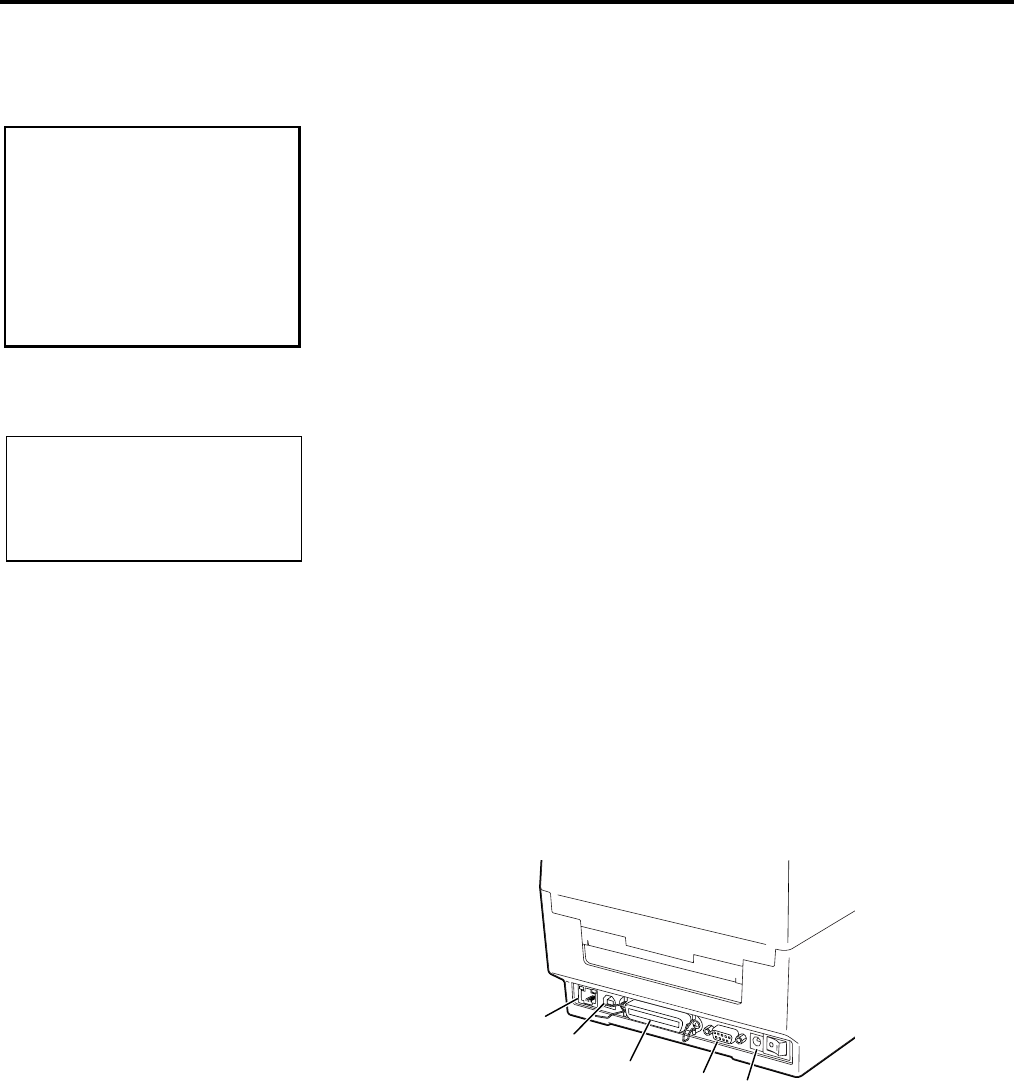
The diagram below shows all the possible cable connections to the
current version of the printer.
c Ethernet Interface
d USB Interface
e Parallel Interface (Centronics)
f Serial Interface (RS-232C)
g Power Jack
c
d
e
f
NOTE:
F
or the specifications of the
serial interface cable, refer to
A
PPENDIX 2, INTERFACE.
g
CAUTION!
Be sure to connect the serial
or parallel cable while the
p
rinter and the host computer
are power-off states. Failure
to do this may cause electric
shock, short-circuit, or
breakdown of the printer.