Scanning Remotely Using Remote Scan Driver 129
5) Original Mode
Select the original mode for scanning.
- Text — Select this when scanning the originals that contain texts.
- Photo — Select this when scanning originals that contain photos printed on photo-
graphic paper.
- Text/Photo — Select this when scanning originals that contain texts and photos.
6) Resolution
Select the resolution for scanning.
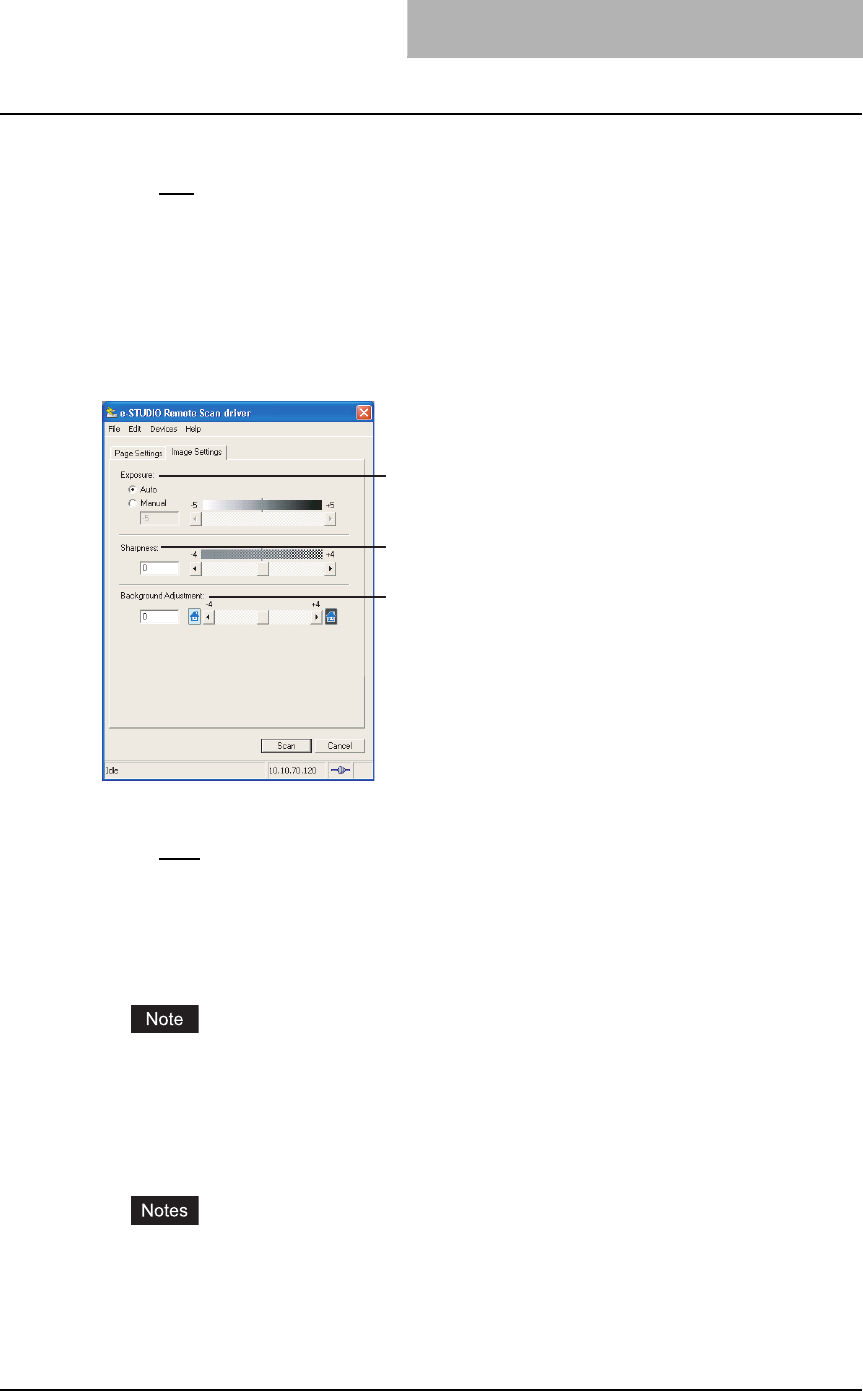
Image Settings Tab
In the Image Settings tab, you can set the following options.
1) Exposure
This sets the exposure for scanning.
- Auto
— Select this to use auto mode for the exposure mode for scanning.
- Manual — Select this to set the exposure manually. When this is selected, set from -5
(lowest) to 5 (highest) in units of 1 by moving the scroll bar.
2) Sharpness
This sets the sharpness for scanning. You can set from -4 (smoothest) to 4 (sharpest) in
units of 1 by moving the scroll bar.
This cannot be set when the Remote Scan driver is connected to the e-STUDIO451c Series,
e-STUDIO452 Series, or e-STUDIO282 Series.
3) Background Adjustment
This sets the contrast of background color for scanning. You can set from -4 (lowest) to 4
(highest) in units of 1 by moving the scroll bar.
yYou can set from -2 (lowest) to 2 (highest) in units of 1 by moving the scroll bar when the
Remote Scan driver is connecting to the e-STUDIO451c Series.
yThis cannot be set when the Remote Scan driver is connecting to the e-STUDIO452 Series
or e-STUDIO282 Series.
1
2
3


