4 Scan to E-mail
52 How to Perform Scan to E-mail
6
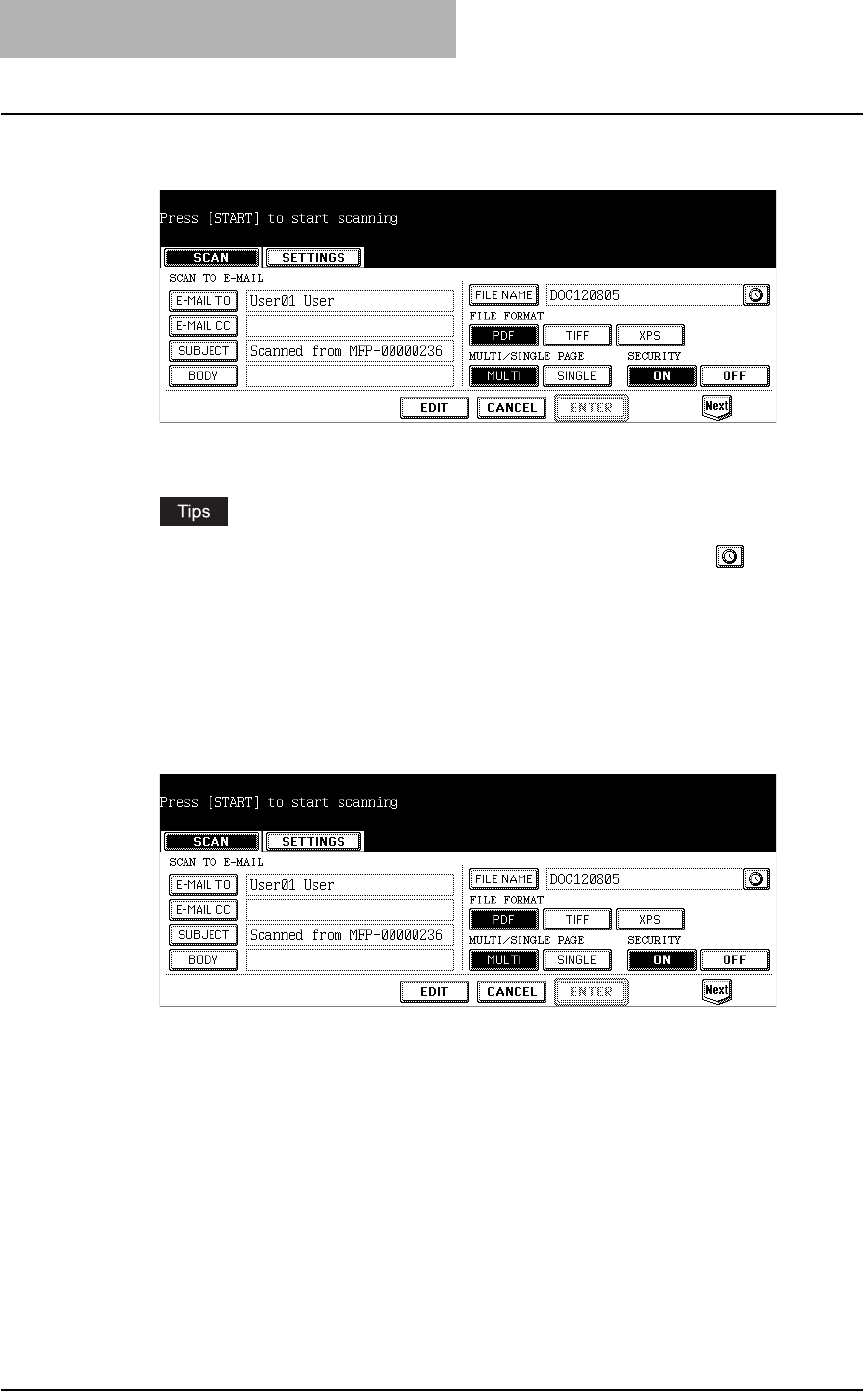
Press the [SUBJECT], [BODY], and [FILE NAME] buttons to enter
each item.
y When pressing each button, the letter entry screen is displayed. Enter the value
using the keyboard and digital keys, and press the [ENTER] button to set the entry.
yWhen you want to add the date and time in the file name, press the button. The
number to indicate the date and time that the job is performed is added to the file
name displayed in the [FILE NAME] field.
yYou can also specify the CC destinations for Scan to E-mail by pressing the [E-MAIL
CC] button.
yThe date and time will be automatically added to the subject.
yThe administrator can change the body message from TopAccess. See the "TopAccess
Administrator Mode" in the TopAccess Guide for details.
7
Select the following items and press the [Next] button.
y FILE FORMAT
[PDF] — Press this to attach the scanned data as PDF file.
[TIFF] — Press this to attach the scanned data as a TIFF file.
[JPEG] — Press this to attach the scanned data as a JPEG file. This can be set only
when [FULL COLOR] or [GRAY SCALE] is selected in the “COLOR MODE” option.
[XPS] — Press this to attach the scanned data as XPS file.
y MULTI/SINGLE
[MULTI] — Press this to attach the scanned data as a multiple page file. When scanning
several pages, this equipment will store all pages as one file.
[SINGLE] — Press this to attach the scanned data as a single file for each page. When
scanning several pages, this equipment will store each page separately as files.
y SECURITY (Encrypt PDF)
[ON]Press this to set Encrypt PDF.
[OFF]Press this not to set Encrypt PDF.


