


65
GB
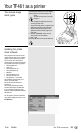
Your TF 461 as a printer
TOSHIBA
TF 461
Your TF 461 as a printer
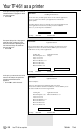
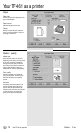
• Accept the current setting (parallel
cable) and click on OK.
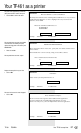
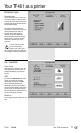
Your are now able to check whether your
TF 461 has been correctly connected by
means of a test printout. If you do not
require a test printout, select ”Skip”.
A sample document can only be
printed with a color cartridge!
Select ”Skip” if a color
cartridge has not been installed.
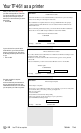
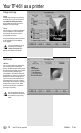
The system starts to copy the printer
driver
• To select Express, use the mouse to
fill the field ( ).
• Then click on OK.
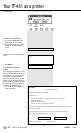
Information
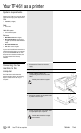
Default Printer Port Selection
Select the PC output port where your printer is connected.
This utility will use the selected port to communicate with your printer, as well as to
update your applications when drivers are installed.
Choose OK to continue after selection, or choose RETURN to return
to the previous screen.
Port
Parallel Cable (LPT1)
Serial Cable (COM1)
Serial Cable (COM2)
OK RETURN
F1 Help AltF4 Exit F10 Menu Bar
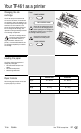
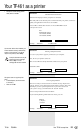
Information
Printing a Sample Document
Let’s see if your printer is properly connected to your computer.
First, be sure your printer is turned on.
Then, choose OK and a sample document will be sent to your printer.
Default Port: LPT1
OK SKIP
F1 Help AltF4 Exit F10 Menu Bar
Information
Choosing Setup Method
You are now ready to choose between two methods of setup: Express and
Custom. ‘Express’ is the quickest and easiest method. ‘Custom’ offers more
flexibility if you have special requirements. If you want to choose how
your system is set up, you should select the ‘Custom’ method.
Choose a setup method from the menu below.
If you need help deciding which method to choose, press F1.
Methods
(") Express
( ) Custom
OK RETURN
F1 Help AltF4 Exit F10 Menu Bar