


31
Operations
30
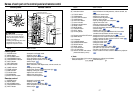
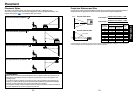
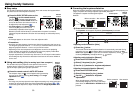
■ Correcting the keystone distortion
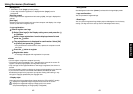
When the projector placement angle against the screen is changed while projecting the
image, the picture will undergo keystone (trapezoidal) distortion.
This projector is capable of correcting this keystone
distortion
.
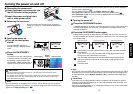
1
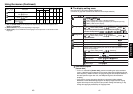
Press the KEYSTONE button.
The Keystone menu appears. By default, [Auto keystone] is selected.
Item Description
Automatically corrects vertical and horizontal keystone distortion.
Press .
Screen shrinking at bottom Screen shrinking at top
Screen shrinking on the left Screen shrinking on the right
Auto keystone
V-keystone
H-keystone
Adjusting vertical distortion [Auto]
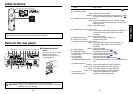
2
Press the button.
The vertical and horizontal keystone distortion is automatically corrected. During
processing, the icon
will appear. When the processing is finished, the Key-
stone menu appears again. If you wish to make fine adjustment, use the
button
to select [V-keystone], and adjust with the
buttons.
Adjusting vertical distortion [Manual]
1
Press the KEYSTONE button.
2
Select [V-keystone] by the button.
3
Use the buttons for keystone adjustment.
Adjusting horizontal distortion [Manual]
1
Press the KEYSTONE button.
2
Select [H-keystone] by the button.
3
Use the buttons for keystone
adjustment.
When the adjustment is finished, the menu
automatically disappears. The menu also disap-
pears when the KEYSTONE or RETURN button is
pressed.
Before correction
After correction
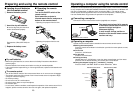
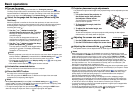
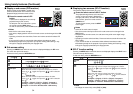
■ Easy setup
This function automatically adjusts the screen focus and corrects the keystone distor-
tion (Auto focus and Auto keystone functions).
Press the EASY SETUP button on the
projector or on the remote control.
The icon will appear during processing.
• Before pressing the EASY SETUP button, be
sure to set Auto focus and select the items to
be adjusted by Auto adjustment
p.42
.
• With [Easy setup] in the Default setting
menu set to [On], the screen focus is
automatically adjusted and the keystone
distortion (vertical and horizontal) is corrected when the power is turned on.
(Automatic keystone distortion correction and auto-setting are selected by factory
setting.)
Note
•A message appears on the screen if the auto-adjustment fails.
Precautions
•Auto focus and Auto keystone functions are effective for projecting size from 40” to
100” diagonal (projection distance: 1.17 m to 3 m) at maximum zoom and 40” to 66”
diagonal (projection distance: 1.79 m to 3 m) at minimum zoom.
• Depending on the room temperature and brightness as well as the projecting
surface condition and material, the adjustment may not be properly made. When
such a case arises, adjust the screen focus manually.
• Improper adjustment or correction may also occur if the AF sensor is obstructed or
the window gets dirty. Remove the obstruction and clean the AF sensor window in
such a case.
■ Using auto setting (Only for analog input from computer)
This function sets up the projector to the optimum state such as
sampling phase, frequency, screen position, and clamp for each
type of the input signal by using simple operations.
Press the remote control’s AUTO SET button.
For computer input, the icon will appear during processing.
You can set as well by selecting [Auto setting] in the Image
adjustment menu
p.39
.
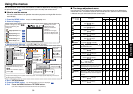
Notes
• The image may not be projected or auto adjustment/setting may not be performed
correctly for input signals other than those supported by the projector
p.86
,
p.87
.
• If auto setting fails adjustment, adjust manually with the Image adjustment menu
p.39
.
Using handy features
Control panel
Remote
Control
Before correction
After correction
Remote
Control
Control panel
Remote
Control