


TL-PS110U Single USB2.0 Port Fast Ethernet Print Server
50
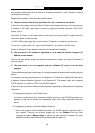
2. If the solution described above is not applicable, you have to follow the instructions below to
set up the print server's IP address.
For the purpose of explanation, we assume the NT server is on Segment A and its IP address is
192.72.214.66 (subnet mask: 255.255.255.224), the print server is going to be installed on
Segment B, with IP address, for example, 192.72.214.100.
1. Find an unused IP address on Segment A for temporary use in the following steps, for example,
192.72.214.68.
2. Connect your print server to Segment A as a networked node.
3. On your NT server, type, for example, "arp -s 192.72.214.68 00-40-01-3F-02-AB". Please note,
in this arp command you have to type 192.72.214.68 on purpose. Do not type this IP address as
192.72.214.100.
4. Type "tftp 192.722.214.68 get config.txt". The configuration file will then be retrieved and
transferred to your NT server.
5. Type "edit config.txt" to modify this configuration file.
6. In your editor, modify "BoxIPAddress" field from "0.0.0.0" to "192.72.214.100". Leave other
options as default and do not change their values. When done, save this new file and quit
from your editor. Please note, in this step you must specify an IP address which is valid on
Segment B, such as 192.72.214.100 in this example, rather than 192.72.214.68.
7. Type, for example, "tftp 192.72.214.68 put config.txt" to save this new configuration back to
print server.
8. Move the print server back to the Segment B.
Done!