


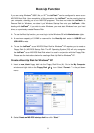
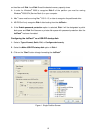


Figure 2. Two Partitions Screen
4. After the format process is finished unplug the JetFlash
™
from the computer. In order for the
new USB-ZIP startup disk settings to take effect you must re-insert the JetFlash
™
and
enter the BIOS setup by restarting the computer (please refer to your computer user’s
manual on how to enter the BIOS).
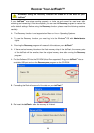
5. Once you are in the BIOS go to the Advanced BIOS Features menu and change the First
Boot Device setting to USB-ZIP. Select Save & Exit Setup and when you are prompted to
SAVE to CMOS and EXIT (Y/N)? type “Y” on the keyboard and press “Enter.”
Your JetFlash
™
and system are now set up, so that your JetFlash
™
can be used to Boot-Up
your computer. When using your JetFlash
™
to Boot-Up your computer the disk will be assigned
a drive letter “A:\>,” if your computer has a floppy drive the letter “B” will be used.
As part of the USB-ZIP startup disk setup process Boot-Up files were placed on the
JetFlash
™
, please do NOT delete, or move these files, otherwise the JetFlash
™
will not be
able to function as a startup disk.
Configuring the JetFlash
™
as a USB-HDD startup disk (Windows
®
98SE only):
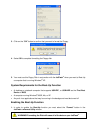
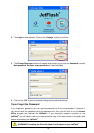
1. Select a Type of format, Quick, Full, or Configure device only.
2. Select the Make USB-HDD startup disk option in Disk 1.
3. Click on the “Start” button to begin formatting the JetFlash
™
.
13