


© Copyright 2012 TRENDnet. All Rights Reserved.
TRENDnet User’s Guide
TPL-306E / TPL-306E2K
5
Installing your Powerline Adapters
Before you Install
1. Before you proceed with the installation, verify the following:
You already have an existing Ethernet network along with a router already
installed.
You already have Internet access through your existing network.
An Ethernet port (also called LAN port) is available on your router.
Verify that you have at least two Powerline adapters. You will need at least
two Powerline adapters to create a Powerline network.
Note: The TPL-306E package only includes a single Powerline adapter. Please
ensure that your other Powerline adapter is HomePlug® AV or IEEE 1901
compliant (e.g. TRENDnet models TPL-303E, TPL-304E, TPL-305E, TPL-307E, TPL-
310AP, TPL-401E, TPL-402E, TPL-405E, or another TPL-306E.) The TPL-306E2K
package already includes two Powerline adapters.
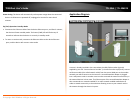
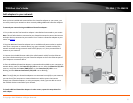
2. Plan the location of where you will install your Powerline adapters.
Avoid plugging the adapters into power strips, extension cords, or surge
protectors as this may prevent the adapter from functioning correctly such as
degrading performance.
Avoid plugging the adapters into wall power outlets that are controlled by a
switch to prevent the Powerline adapter from being turned off accidentally.
Avoid plugging the adapters into wall power outlets that are located near
appliances that consume a lot of power (e.g. refrigerators, washers, dryers) as
this may degrade performance.
Make sure there is an available wall power outlet in the room where the router
is installed and also near the router.
Make sure there is an available wall power outlet in the room where you want
to extend your network connectivity.
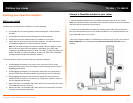
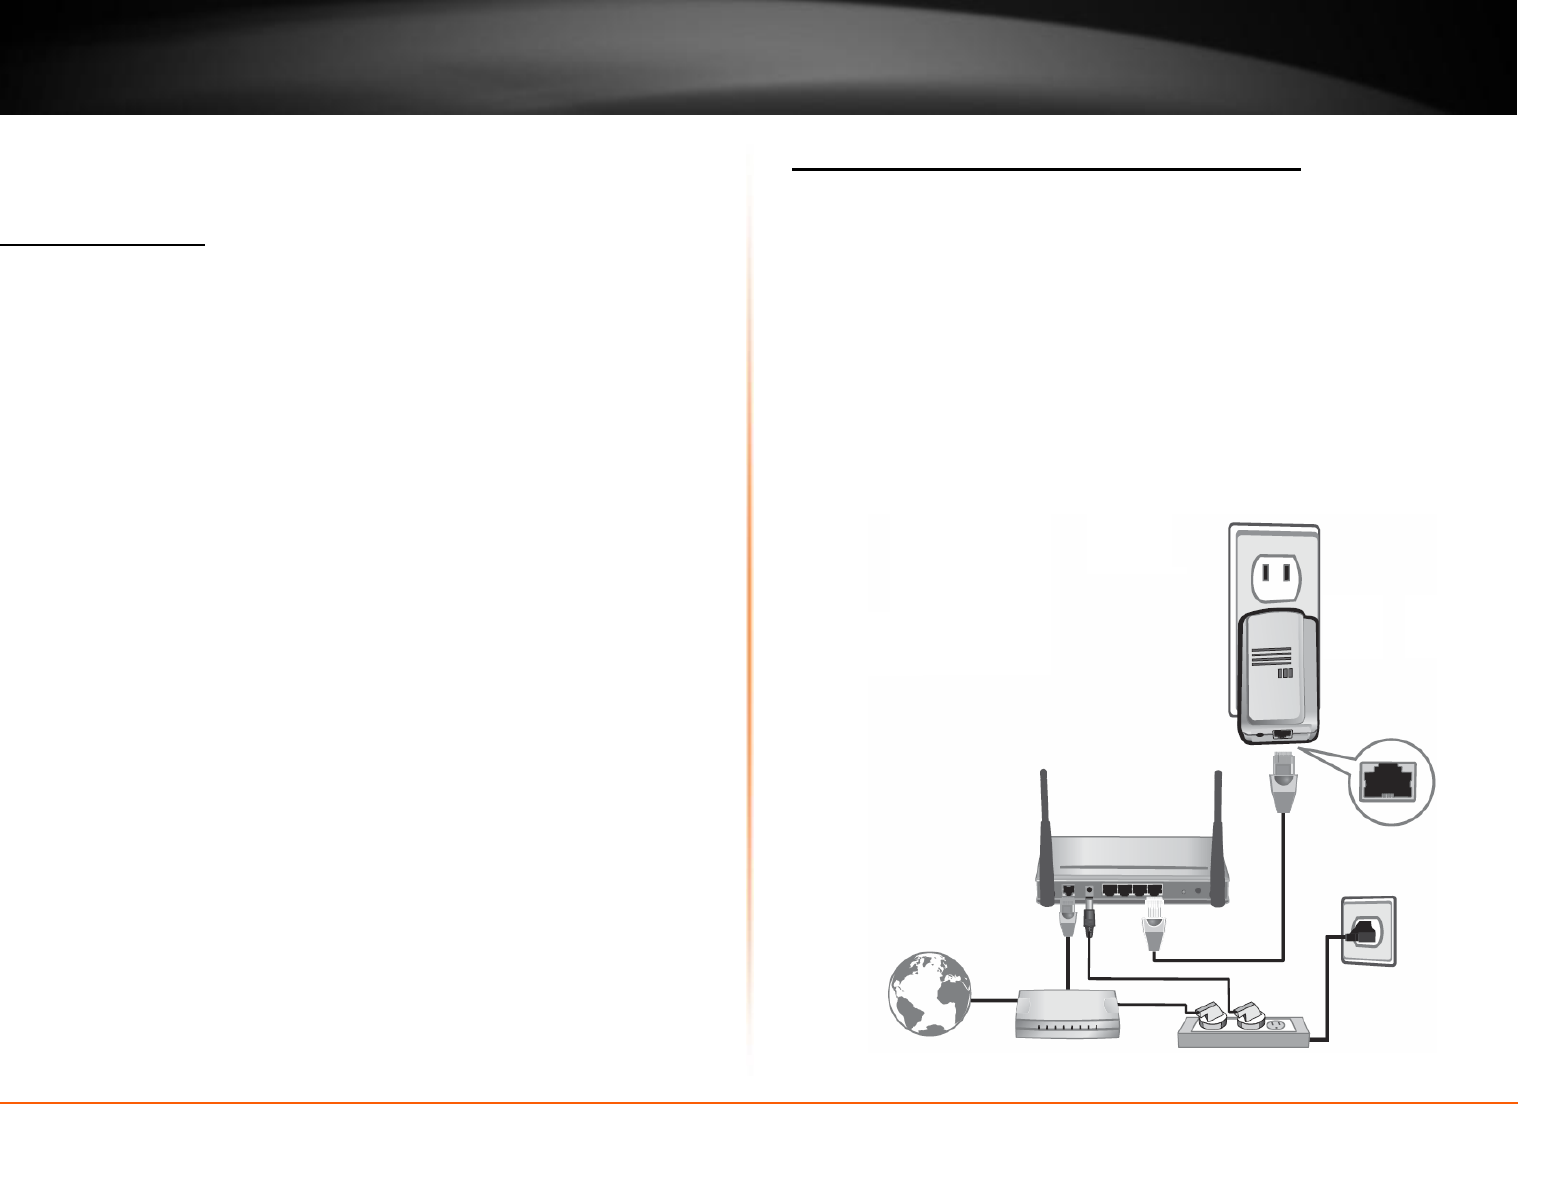
Connect a Powerline adapter to your router
1. Plug the Powerline adapter into an available wall power outlet near your router.
Note: This will allow devices connected to your Powerline network to access the Internet
and other devices connected to your network.
2. Connect the included Ethernet cable (also called network cable) from the Ethernet
port (also called network port) of your Powerline adapter to an available Ethernet port
(also called LAN port) on your router.
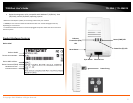
3. Once the Powerline adapter is installed and connected to your router, verify that the
Power (PWR) LED is on or blinking and the Ethernet Connection (ETH) LED is on or
blinking.