


9
QUICK START
INSTALLING THE INKING SYSTEM ASSEMBLY
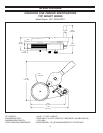
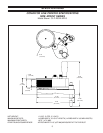
Your new Non-Porous Conveyor Line Printer was fully assembled and adjusted at the factory before final inspec-
tion. In order to minimize the size of the shipping cartons used to package these machines, the Non-Porous
Inking System Assembly was removed from the Pivot Arm and must be reinstalled before operation.
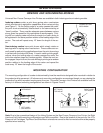
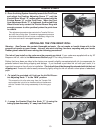
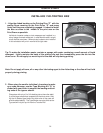
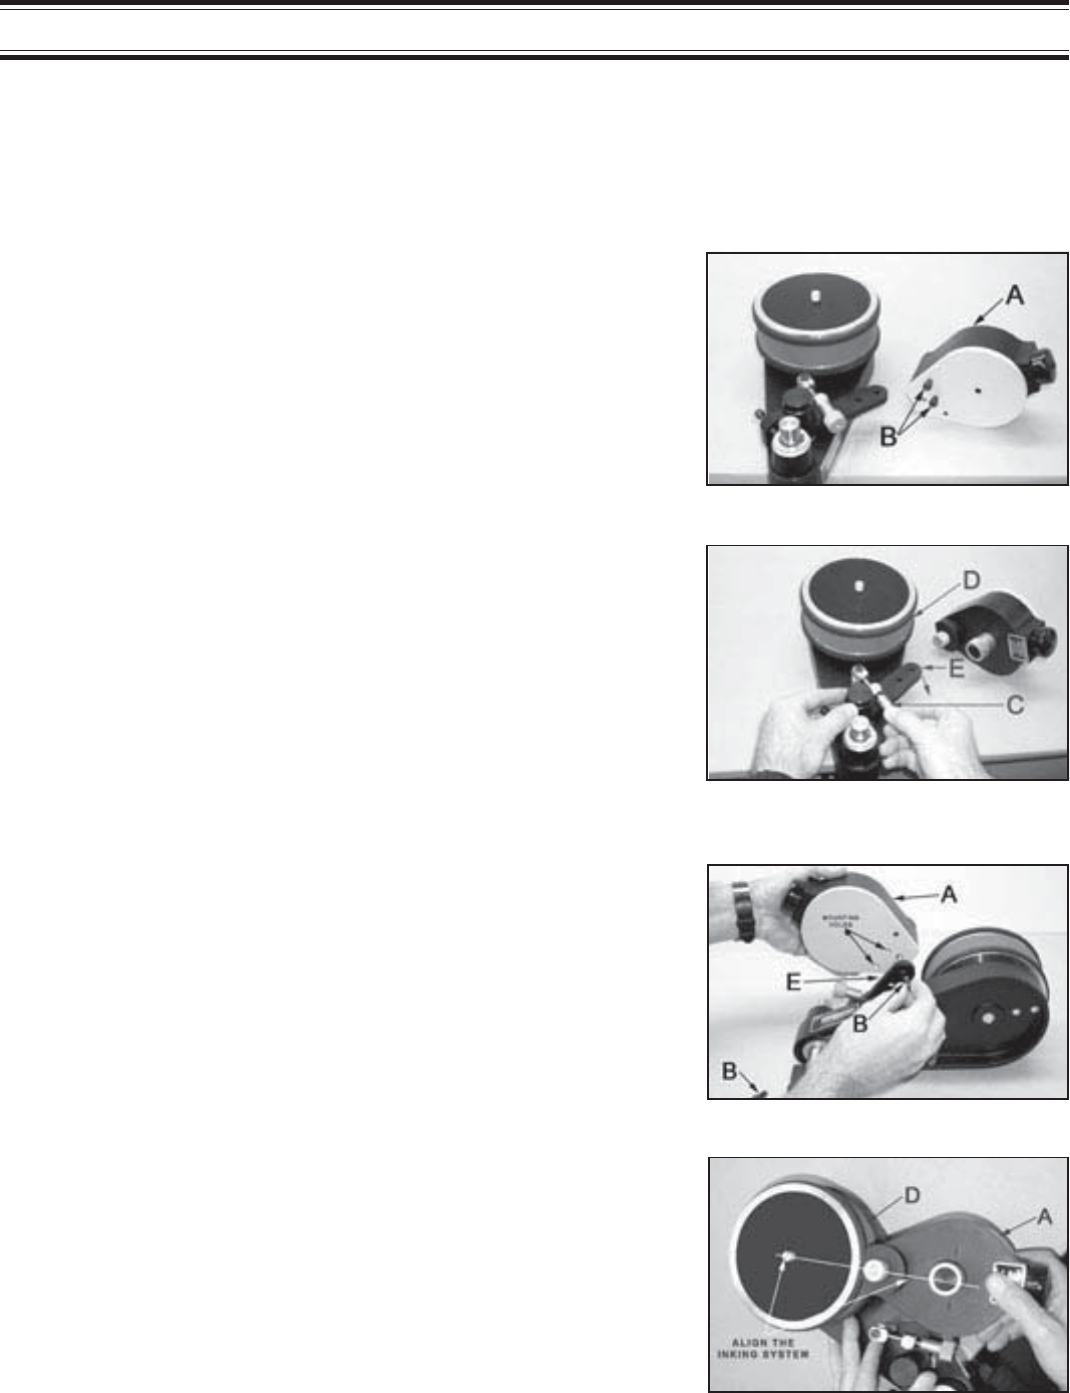
2 -Loosen the Pivot Arm Adjusting Knob “C” and rotate the
Pivot Arm “E” away from the Print Drum “D” slightly.
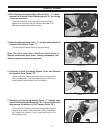
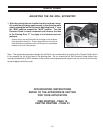
3 -Position the Inking System Assembly “A” on top of the Pivot
Arm “E” and align the two holes in the Inking System with
the matching holes in the Pivot Arm. Reinstall the two Mount-
ing Screws “B”.
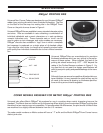
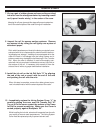
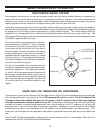
4 -Rotate the Pivot Arm until the Inking System Assembly “A”
contacts the Print Drum “D”. There is a small amount of clear-
ance in the mounting holes in the Pivot Arm. While holding
the Inking System against the Print Drum, align the Inking
System so that it points directly at the center of the Print
Drum and tighten the two mounting screws securely.
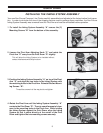
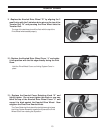
1 -To install the Inking System Assembly “A” remove the (2)
Mounting Screws “B” from the bottom of the assembly.
FIGURE 8
FIGURE 9
FIGURE 10
FIGURE 11
This will allow the Inking System to be installed without
contact interference with the print drum.
Thread the screws in all the way but do not tighten.