


3-6
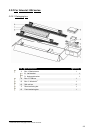
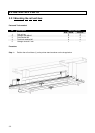
3.2.3 Installing the tensioning bars
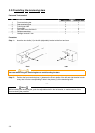
Parts and Tools needed
No Description Quantity
RH3 & SPFR ValueJet 1604
1 Front tensioning bar 1 1
2 Rear tensioning bar 1 1
3 D-lock type shaft 2 -
4 Pivot shaft - 2
5 Pan head screw flat M4x10 4 4
6 Philips screwdriver 1 1
7 Hexagon wrench 5 mm 1 1
Procedure
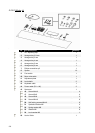
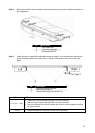
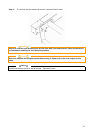
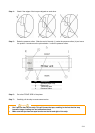
Step 1 : Insert the two shafts (1) in the left (adjustable) bracket at the front and rear.
front rear
Caution
Use care when lifting the tensioning bars to avoid bending the bars.
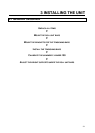
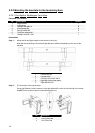
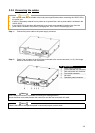
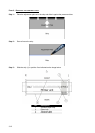
Step 2 : Position the front tensioning bar (1) between the D-lock shafts of the left and right bracket in such
a way that it fits the corresponding D hole in the plates (2) of the tensioning bars.
–––
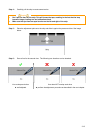
Notes
While installing the tensioning bar, push the adjustable shaft in the left bracket, to make insertion of the
front tensioning bar possible.