


4-4
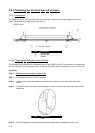
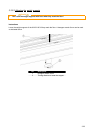
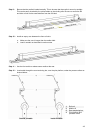
Step 13 : Take the media on the front of the printer and pull until the rear tensioning system gently hits the
back of the machine. This to become an equal tension.
Step 14 : Lower the pressure rollers
Step 15 : Set the unwinder (REAR) unit to AUTOMATIC.
The rear tensioning system will go to its initial position.
Notes
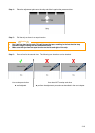
Be sure to make the correct settings on the control panel of the winding system. OUTSIDE or INSIDE
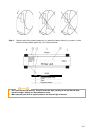
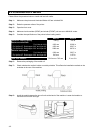
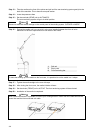
Step 16 : Forward the media until you can stick it to the core installed between the front roll units.
Make sure to have an equal tension on both sides of the media.
HINT
To ease the winding up of the media on the front core, it is permitted to cut the media in a V-shape.
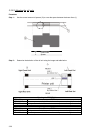
Step 17 : Tighten the media straight to the core with tape.
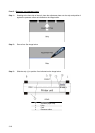
Step 18 : After closing the front cover, the media initialize will start.
Step 19 : Set the winder (FRONT) unit to ACTIVE. The front tensioning system will be activated.
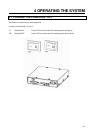
Step 20 : Installation of the media is completed.
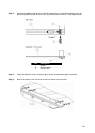
Notes
With a small intervention it is possible to reverse your winding direction. Mount the twist cable between the
control box and the front motorized unit cable.
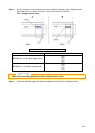
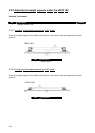
1
Roll unit
2
Empty core
3
Front tensioning bar