6 • Getting to know the WIDE FORMAT COPY SYSTEM XEROX WIDE FORMAT COPY SYSTEM
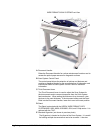
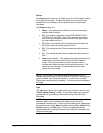
A. Standard Stacker
The Stacker is located at the rear of the Scan System. When the
AUTORETURN feature is set to REAR, documents exit the Scan
System onto the Stacker. The Stacker can be adjusted to any one of
four positions by raising or lowering it. The height of the Stacker
should be adjusted to accommodate the document being scanned. It
has two extensions at its end that can be pulled out to accommodate
longer documents (up to size E or A0). When scanning most common
weight (20 lb, 80gsm) documents, move the Stacker to the 2nd rung
from the bottom.
NOTE: All thick documents, and documents over 36 inches (914 mm),
exit from the rear of the Scan System (regardless of the AUTORETURN
setting). When scanning thick documents, the Stacker must be set to the
lowest position for optimum performance.
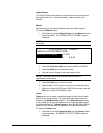
B. Document Exit Slot
When the DOCUMENT RETURN feature is set to REAR, documents
exit the Scan System through this slot and are delivered to the rear
Stacker.
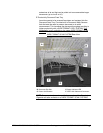
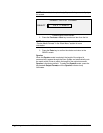
C. Power On/Off Switch
This switch turns the Scan System on and off. Press this switch to
the on (I) position to turn on the Scan System and to the off (O)
position to turn off the Scan System.
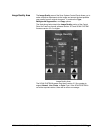
D. The Power Cord supplies power to the Scan System. Plug one end of
the cord into the Scan System and the other end into an electrical
outlet.
E. Status LED
The digital status LED provides an indication of the condition of the
Scan System and communications with the FreeFlow Accxes
Controller. A letter “P”, displayed on the LED Display on the rear of
the Scan System, indicates that the Scan System is operating
normally and has established communications with the controller.
F. IEEE 1394 Cable and Connector
The IEEE 1394 Cable is the communications link between the Scan
System and the Controller. Plug one end of the cable into either one
of the IEEE 1394 connections at the rear of the Scan System. Plug
the other end into the IEEE 1394 connection on the Controller.


