


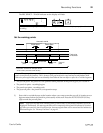
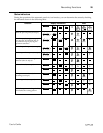
Recording Functions
20
User’s Guide
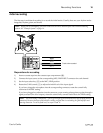
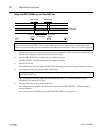
Rehearsal
After you have set the recording levels, you should rehearse the overdub to verify and adjust the settings
and cue levels.
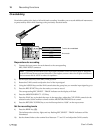
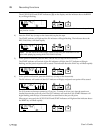
11) Press the PLAY key to start the rehearsal.
The indicator above the key lights and the MT4X starts the tape. Start playing.
12) Press the RETURN TO ZERO key to stop the rehearsal and rewind the tape.
The indicators above the REHE and PLAY keys switch off and the REC SELECT - TRACK indicators
resume flashing.
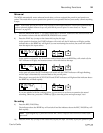
Record the track
13) Press the REC/PAUSE key.
The indicator above the key lights and any flashing REC SELECT - TRACK indicators will be
illuminated.
14) Press the PLAY key.
The indicator above the key lights and the MT4X starts the tape. Play the part again.
15) When the track is complete, press the RETURN TO ZERO key to stop and rewind the tape.
The indicators above the REC/PAUSE and PLAY keys switch off and the REC SELECT - TRACK
indicators resume flashing.
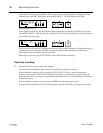
Check the completed recording
16) Press the PLAY key to playback the tape and check the recording.
17) If the recording needs to be redone, repeat the previous steps.
Tip:
Sometimes the pitch of an instrument and the pitch of the previously recorded tracks is slightly
different. If you cannot adjust the pitch of the instrument, you can compensate for the error with the TAPE
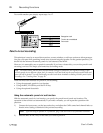
SPEED CONTROL (
F
) - PITCH control. The PITCH control can adjust the tape speed by approximately
±
10%. During rehearsal, adjust the PITCH control until you have matched the instrument with the tracks.
Note:
To prevent wow and flutter effects, do not accidentally adjust the PITCH control while you are
recording.