


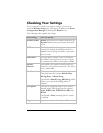

Chapter 2: Setting Up Your Wireless Network
25
Connecting a Windows XP
Computer with Built-in Wireless
Capabilities
1 On your Windows desktop, click the Start button then click
Control Panel.
2 Double-click the Network Connections icon.
3 Right-click the Wireless Network Connection icon, then
select Properties.
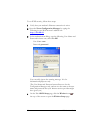
4 On the Wireless Network Connection Properties dialog,
select the Wireless Networks tab. Windows will automatically
scan for available wireless networks in your area. Any
compatible networks within range will appear in the Available
networks list. It should find the wireless network of the
X6v—named zoom. (The scan is done automatically because
the Use Windows to configure my wireless network
settings check box is selected by default).
5 Select zoom from the Available networks list, then click the
Configure button to add it to the Preferred networks list.
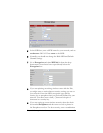
The notebook will try to connect to the Internet using the
wireless networks listed here, in the order in which they
appear. (If you already have networks listed here, we
recommend you either remove them or use the Move up
button to move zoom to the top of the list.)
6 Click OK.
7 Test your wireless connection. From the computer or
notebook that you set up, open your Web browser (for
instance, Internet Explorer or Netscape Navigator) and try to
connect to a familiar Web address.
If you connect successfully, your notebook’s wireless
capability is configured and you are ready to browse the Web!
Important!
If you want to add security to your network, please see Setting
Wireless Security on page 29.