


Wall Mounting the Office
Connect H
ub
2-7
Wall Mounting the Office
Connect H
ub
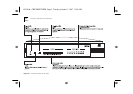
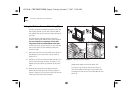
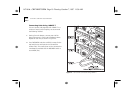
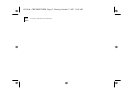
There are two slots on the underside of the
OfficeConnect hub which are used for wall
mounting. You can mount the hub with the LEDs
facing upwards or downwards, to suit your needs.
When wall mounting your hub, ensure that it is
within reach of the
power outlet.
You need two suitable screws. Ensure that the wall
you are going to use is smooth, flat, dry and sturdy.
Make two screw holes which are 1
42
mm (5.
6
in)
apart. Use the arrows at the top of the Quick
Reference Guide to mark the position of the holes.
Fix the screws into the wall, leaving their heads 3 mm
(0.12 in) clear of the wall surface.
Remove any connections to the hub and locate it
over the screw heads. When in line, gently push the
hub on to the wall and move it downwards to
secure. When making connections, be careful not to
push the hub up and off the wall.
CAUTION:
Only wall mount single hubs, do not wall
mount stacked hubs.
Connecting Workstations and Other
Equipment to Your Hub
WARNING:
Ensure you have read the Important
Safety Information section carefully before you start.
ACHTUNG:
Versichern Sie sich, daß Sie den
Abschnitt mit den wichtigen Sicherheitshinweisen
gelesen haben, bevor Sie das Gerät benutzen.
AVERTISSEMENT:
Assurer que vous avez lu
soigneusement la section de L’information de Sécurité
Importante avant que vous commenciez.
CAUTION:
Do not power the hub off and on quickly.
Wait about 5 seconds between power cycles.
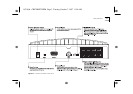
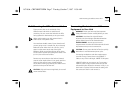
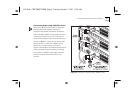
Connecting workstations and other equipment to
your hub is easy. Connect them using 10BASE-T
cables to any of the hub’s eight 10BASE-T RJ45 ports.
10BASE-T cables are very easy to use. To connect a
10BASE-T cable, simply slot the connector into the
relevant RJ45 port. When the connector is fully in, its
latch locks it in place. To disconnect the cable, push
the connector’s latch
in a
nd remove it.
16710.bk : CREYRNET.FRM Page 7 Tuesday, October 7, 1997 11:38 AM