


16 Chapter 3: OSN|M Installation
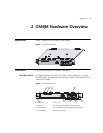
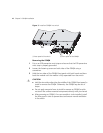
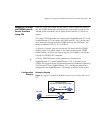
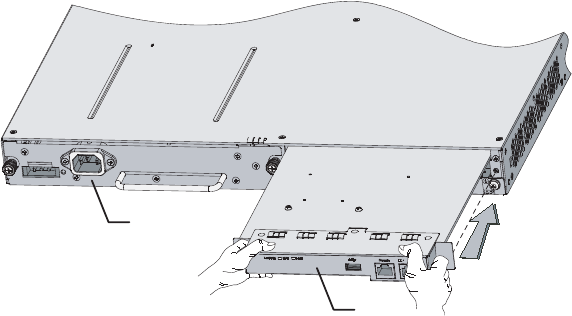
Figure 3 Install an OSN|M in a switch
Removing the OSN|M
1 Put on an ESD-preventive wrist strap and ensure that the ESD-preventive
wrist strap is properly grounded.
2 Loosen the fastening screws on both sides of the OSN|M using a
screwdriver.
3 Hold the two sides of the OSN|M front panel with both hands and draw
back the module until the module is fully separated from the switch.
c
CAUTION:
■ Hold the two sides rather than the middle of the OSN|M front panel to
install or remove the OSN|M. Otherwise, the OSN|M may be out of
shape.
■ Do not apply excessive force to install or remove an OSN|M, and do
not touch the surface-mounted components directly with your hands.
■ After removing an OSN|M, if no new module is to be installed, install
the filler panel in time to prevent dust and ensure normal ventilation
in the switch.
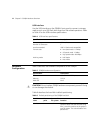
(1) Rear panel of the switch (2) Front panel of the OSN|M
(1)
(2)