


Installing the IntelliJack
5
Installing the
IntelliJack
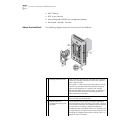
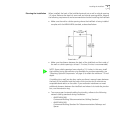
Installing the IntelliJack consists of the following steps:
1
Set up the power supply (page 6).
2
Install the adapter plate and pass-through ports (page 8).
3
Plan the installation (page 9).
4
Set up the network cabling at your site (page 10).
5
Connect the IntelliJack to the network (page 10).
6
Mount the IntelliJack to the wall or office cubicle (page 11).
7
Connect the local power supply (page 12; optional) not required if your network
supports Power Over Ethernet or if you are using a single-port or multi-port power
supply).
8
Connect network devices to the IntelliJack (page 13).
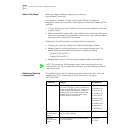
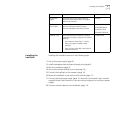
Local power
supply
For locally powering a single IntelliJack;
required if your network does not support
Power Over Ethernet.
3CNJPSL
VoIP telephone
power cable
For powering a VoIP telephone on a network
that uses Capacitive Power Discovery
Process-compatible Power Over Ethernet.
3CNJVOIPMOD-NBX
3CNJVOIPMOD-20
3CNJVOIP-CPOD
3CNJVOIP-CPOD-20
Extension ring For ensuring that the IntelliJack is properly
mounted to a cubicle; required if the cubicle
opening:
n
Has a depth of fewer than 1.5 inches.
n
Does not support the NEMA-WD6
standard.
n
Does not have pre-drilled screw holes for
standard mounting.
3CNJEXTRING
Component Purpose 3C Number(s)