


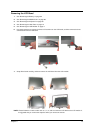

Chapter 3 77
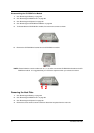
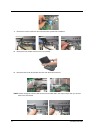
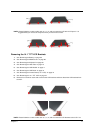
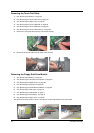
NOTE: Please follow the numeric orders such as 1, 2, 3, and 4 to screw the LCD to the LCD panel. It is
suggested that you reverse the sequence when you remove the screws.
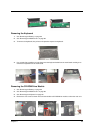
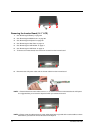
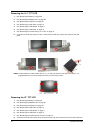
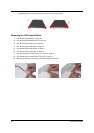
Removing the 14.1” TFT LCD Brackets
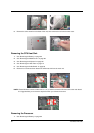
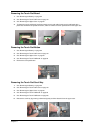
1. See “Removing the Battery” on page 62
2. See “Removing the Middle Cover” on page 68
3. See “Removing the Keyboard” on page 69
4. See “Removing the Heat Plate” on page 70
5. See “Removing the LCD Module” on page 71
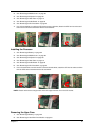
6. See “Removing the LCD Bezel” on page 73
7. See “Removing the Inverter Board (14.1” LCD)” on page 74
8. See “Removing the 14.1” TFT LCD” on page 76
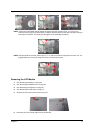
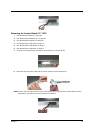
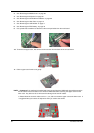
9. Remove four screws on each side to remove the LCD brackets and then detach the LCD brackets from
the LCD.
NOTE: Please follow the numeric orders such as 1, 2, 3, and 4 to screw the LCD brackets to the LCD. It is